This definitely has to go in the category, “If I can do this, absolutely anyone can.” I made my own static grass applicator that really works!
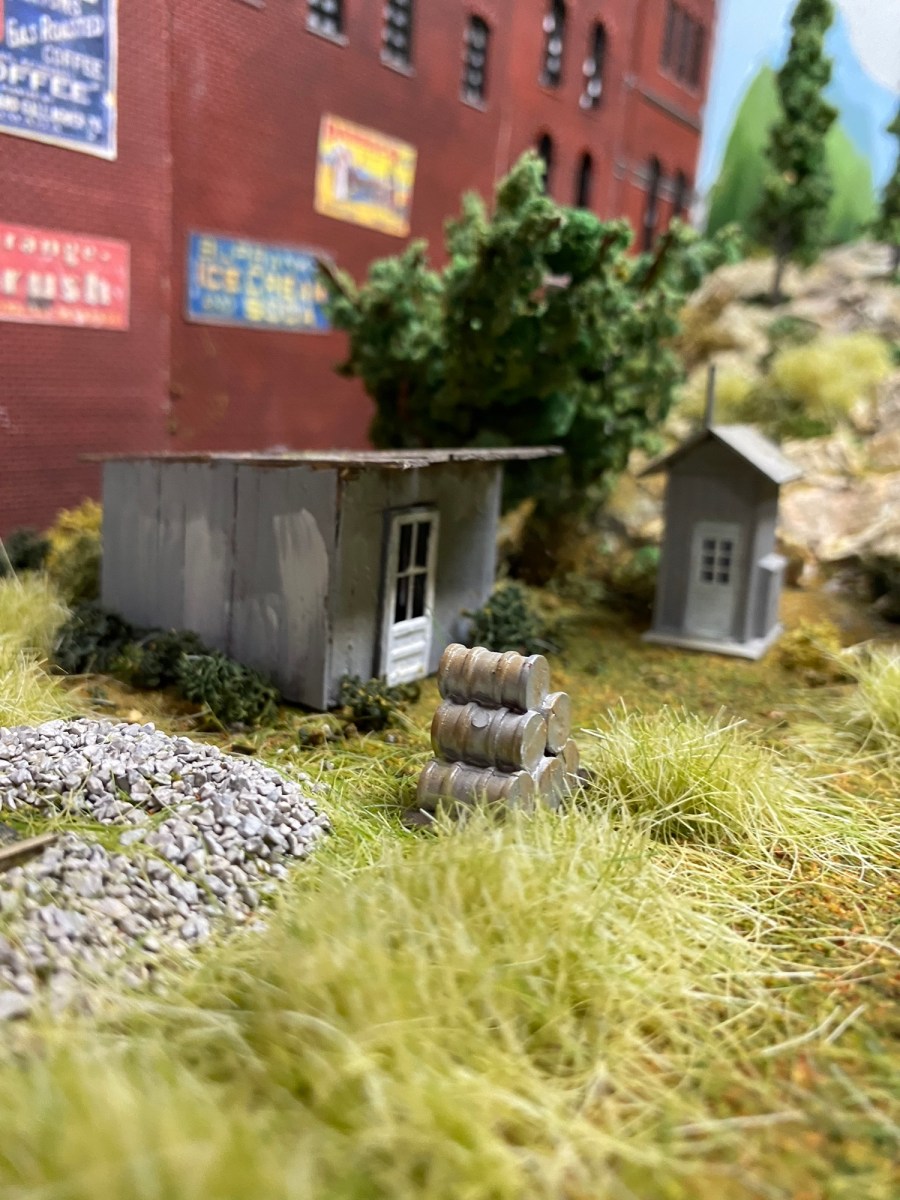
I’ve been working steadily on the scenery of The Maple Valley Short Line Model Railroad. I’m creating scenes with more detail than I have on any other layout. On my previous model railroads I was happy with paint and some turf sprinkled here and there. The Maple Valley Short Line will probably be my last layout, so I’m doing it right.
I visited many sites showing modelers using static grass applicators, but when I looked at the cost I decided standing weeds weren’t necessary. I changed my mind. I started looking for videos showing how to make a static grass applicator and found several.
The self-built models are all pretty similar. It wasn’t difficult to find the parts. It was harder trying to tell myself I could actually do this and have it work.
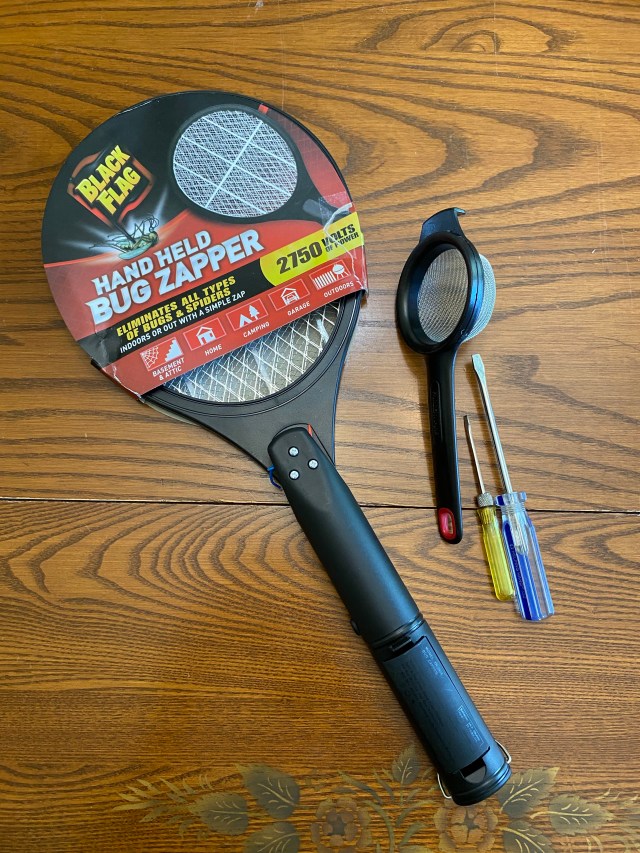
The Black Flag Hand Held bug zapper I purchased for $10.95 at Home Depot promised to deliver 2750 volts of shocking power to any little critters that happened to get too close. It also delivered a powerful shock to my finger!
I found a small Farberware plastic strainer with a metal screen mesh to use as the grass spreader.
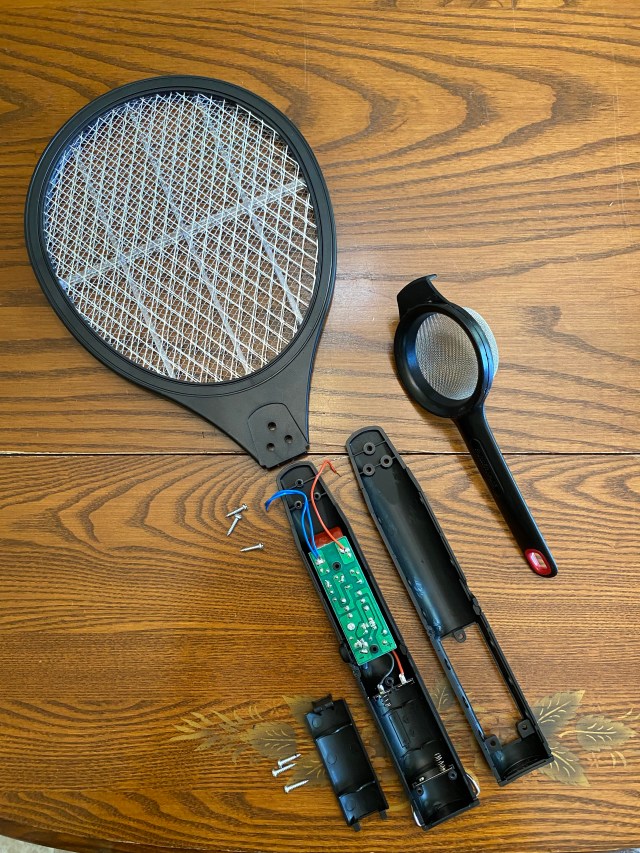
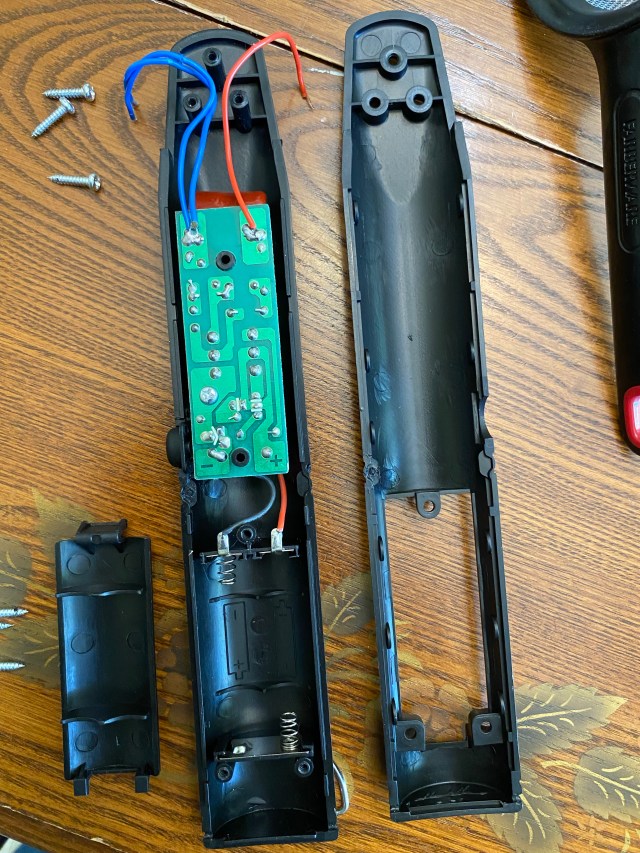
I first removed all the screws from the back of the handle. Three screws held the zapper screen in place, three more screws were in the battery compartment. Once the screws were removed the pieces came apart easily.
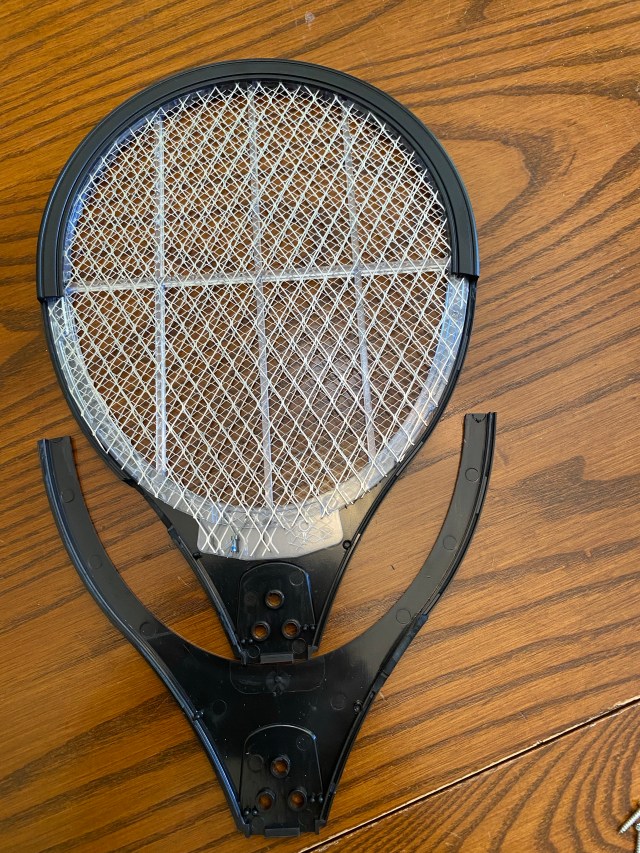
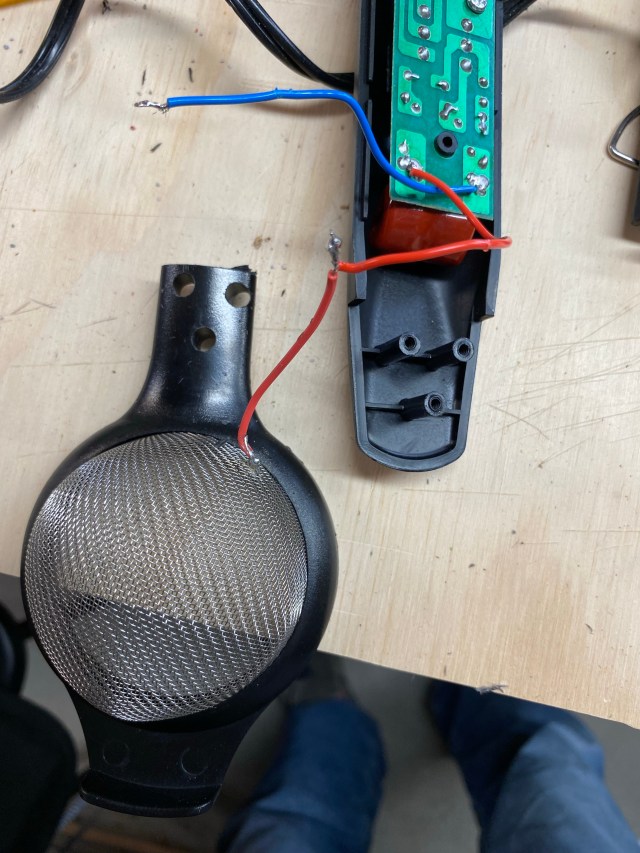
There were no screws in the wand, so I forced a screw driver blade into the seam to break the pieces apart. A red wire was soldered to the inner screen, a blue wire was soldered to each of the outer screens. I snipped the wires off at the screen. The two blue wires came from the same point on the control board, so I removed one.
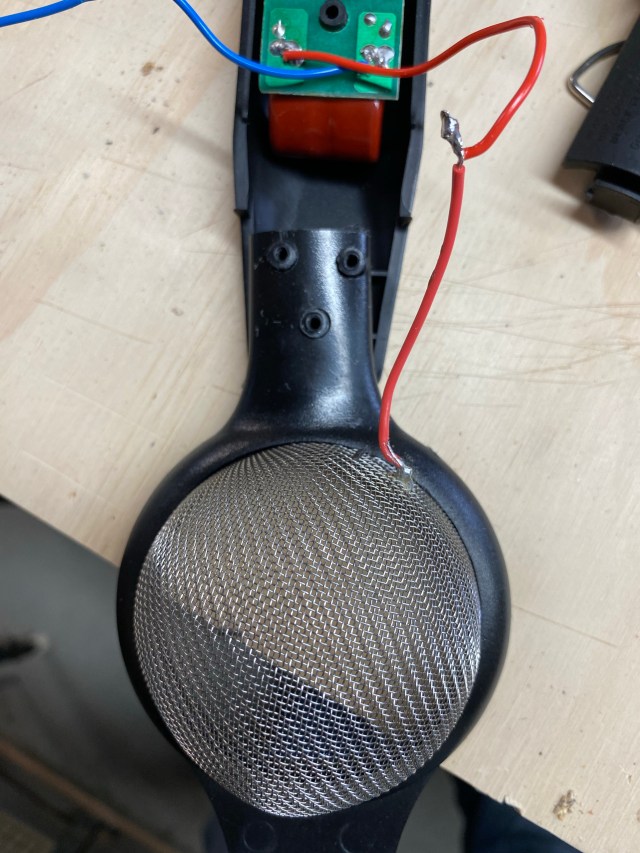
After the extra blue wire was removed from the control board, I soldered a long green wire to the blue wire. I soldered a short red wire to the red wire from the board. The red wire carries power to the wire mesh basket. The green wire is attached to the area where the static grass will be applied. Static electricity is created by the field between the wire mesh and the surface of the layout.
I held the strainer next to the zapper handle to see how much of the strainer handle would fit and cut off the remainder. The handle of the Farberware strainer is about the same width as the zapper handle. I held the cover of the zapper on the strainer handle and used a small drill bit to make pilot holes for the screws. I then used a larger bit, the size of the screw posts in the zapper handle, to carefully drill out the pilot holes. The handle of the strainer fits perfectly over the screw posts.
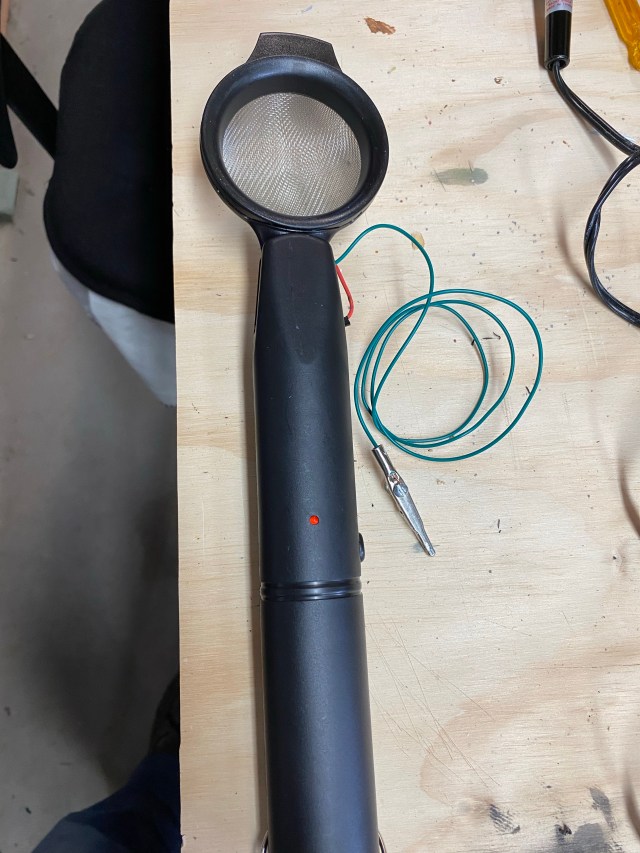
After tinning the wire, I poked it through the screen, made a loop and poked it back through the mesh. I twisted the wire with itself and soldered it, creating a solid connection.

The simple contact button on the side of the handle has to be held to create the static field between the two leads. The applicator is powered by two AA batteries.
This is the finished product. The strainer handle fits tightly inside the zapper handle, thanks to the three screw posts. The cost of this static grass applicator was about $15.00.
I have already discovered using a static grass applicator takes some practice. I purchased some short static grass at Rider’s Hobby Shop, and I can see it’s too short. Taller grass will look more realistic in scenes where there is not much activity.
It’s best to use the static grass applicator on one small area at a time. A thinner white glue solution works better than glue right out of the bottle.
Good luck with your own static grass applicator construction. If I can do it, you can do it!
By the way, I wasn’t kidding about getting a shock. Make sure to keep your fingers away from the screen while you’re working on your scenes. You’ll find out quick, like I did, why bugs don’t like zappers!

Pingback: Hand-Planted Weeds: Adding Fine Details to the Maple Valley Short Line Model Railroad – A Coffee State of Mind
Good evening! I have 2 questions. Do you have any pictures you might share of your results using this with, say, 2-4mm long grass?
And second, do you think this technique would work on a flexible base like a fabric?
LikeLike
Hello, thank you for the question. I don’t have any photos specifically for 2-4mm. I use longer grass. I was not satisfied with the results using the short grass. I really couldn’t suggest whether the static application process would work on fabric. Thanks.
LikeLike