
I understand that experience is a great teacher. With model railroading, however, small mistakes can have a cascading effect that will make operating your railroad a frustrating experience.
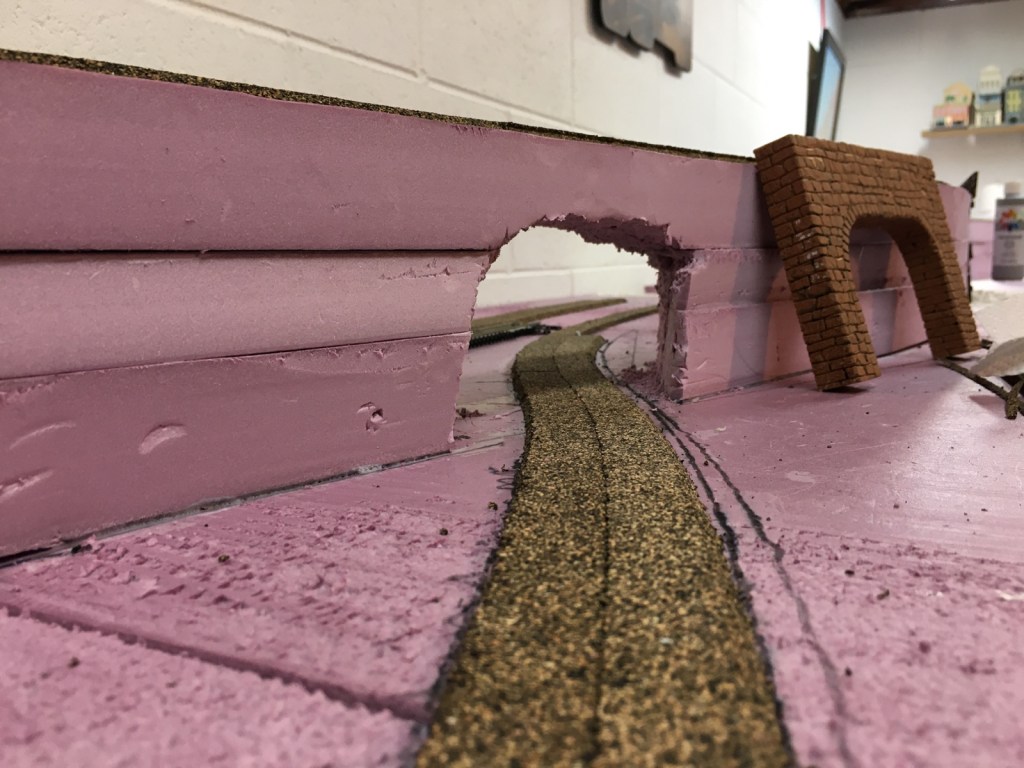
If you are going to use extruded foam as the base of your layout, be sure to notice the edges of the foam. Undoubtedly, there will be a slight dip along the edge of the foam piece. When you put two edges together, you will have a sizeable dip in the foam. So what, you ask? I’ll tell you. In fact, let me show you. (This is a good writing hint. The pros say, “Show, don’t tell.”)
At every joint of the pink foam, there was a dip I did not notice until I was gluing the cork roadbed in place. If I proceeded to lay track without fixing the problem, every dip would have caused cars to uncouple. That would have been exasperating immediately.
In the photo, you can see white pieces of cardboard sticking out from under the cork roadbed in several places. I had to glue small squares of cardboard to the foam to make a level connection for the cork roadbed. I had to do that at every place where roadbed crosses foam joints.
So, how should I have fixed the problem before it happened? The best answer, I think, would have been to cut two inches off the edge of each foam piece, and then glue the two cut edges together. The joints would have been level when the extruded foam was glued to the plywood base. It would have saved me a lot of time and frustration.

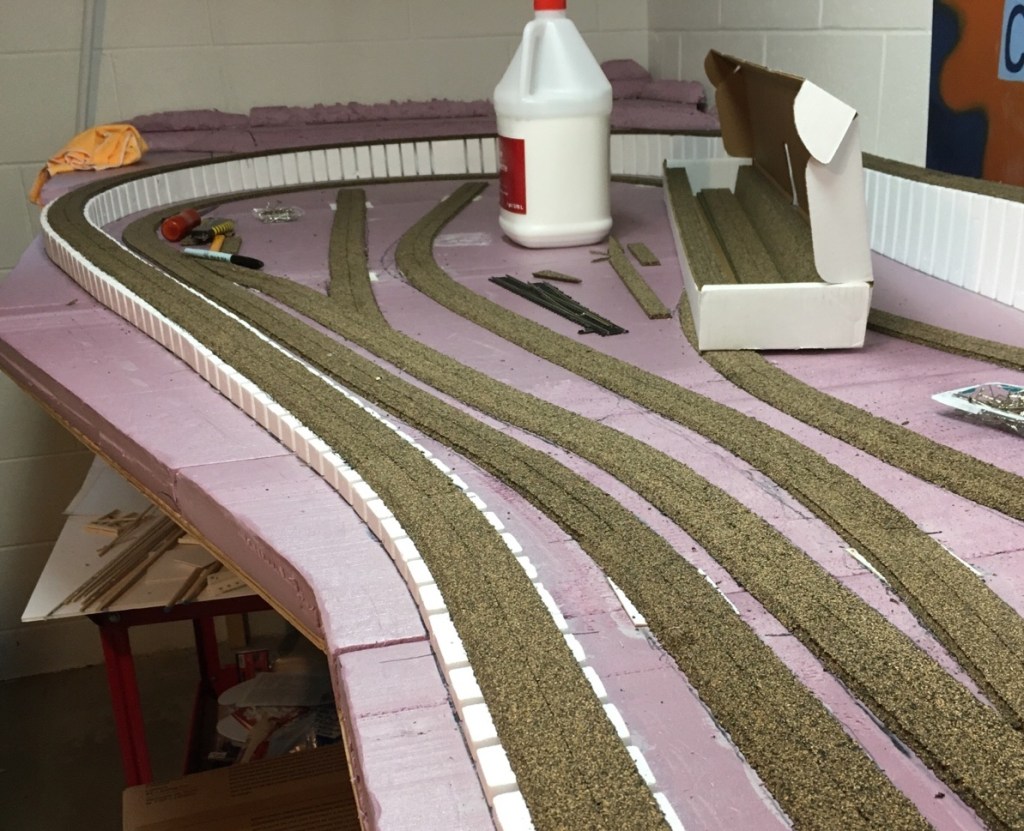
When you look at these photos, do you see any obvious problems, other than there being so much work to do? (If you see something beyond what I’m talking about here, don’t tell me.) If I had noticed this little detail, I would have been saved a ton of work.
Cork roadbed comes in three-foot strips, with two halves. When the halves are pulled apart, the square edges are butted together when the roadbed is glued in place. The beveled edges become the outside of the roadbed.
Here’s what I missed, and what can save you a bunch of unnecessary work. The beveled edges of the cork are very rough, and in some places a sizeable edge hangs over the bevel. Here’s the key: either before or after you glue the roadbed in place, sand the beveled edge so it is smooth. Believe me, it’s going to save you time and a lot of ballast.
Here’s the result of not sanding the edges of the cork roadbed before I started adding ballast. I bought one of those nifty ballast spreaders and it works great. But little rough edges of cork were showing through.
In several places, I used a utility knife to cut away the rough edge and reapplied ballast. In other places, I just used more ballast to cover it up. That will make gluing the ballast more time consuming and difficult. Experience, as I said, is a great teacher.
No one who comes to see my layout will ever know about this, because I’m not going to tell them. If you don’t say anything, no one will ever know. I just thought I might be able to save you from making the same mistake.
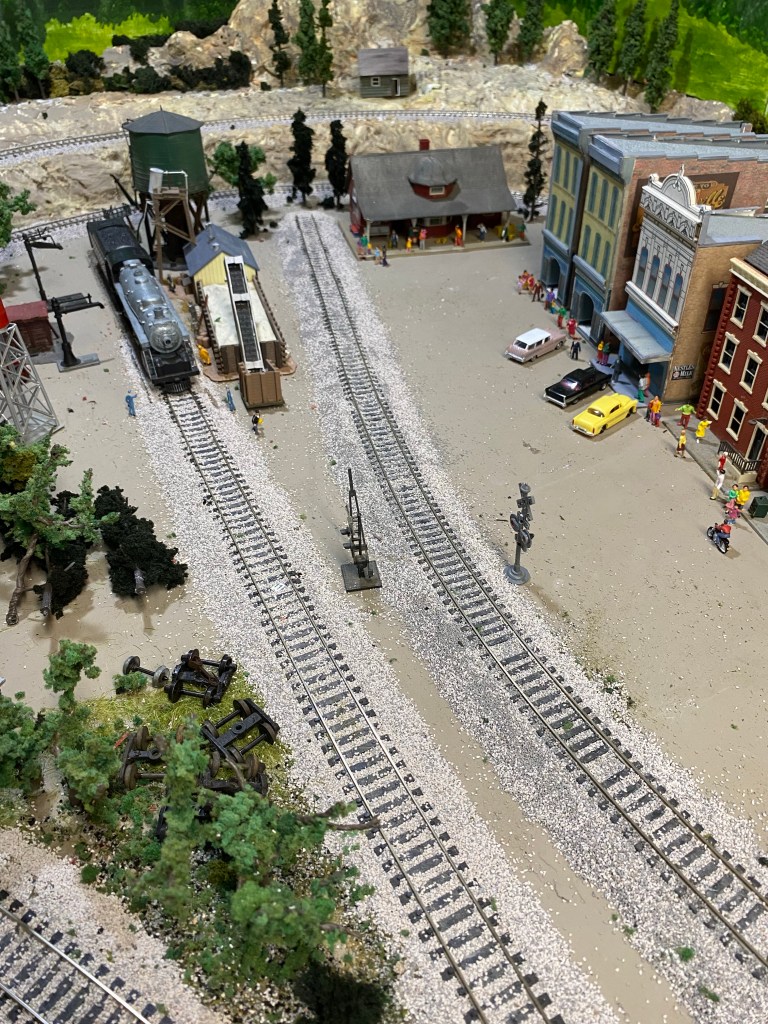
The Maple Valley Short Line Model Railroad is a great layout, if I do say so myself. It’s not huge, but it is the biggest layout I’ve ever built. I expect to continue perfecting the MVSL for many years to come. Model railroading is a great teacher.

Foam is great for contours, but adding switch stands later on means adding support. It’s not all it’s promoted as being.
LikeLiked by 1 person