My Maple Valley Short Line Model Railroad in HO scale has more detail than any of my previous layouts. Model railroading is a learning experience, which is a big part of the fun. Scenery on a layout is never quite finished because there is always some little item that can be added to make a scene more realistic.

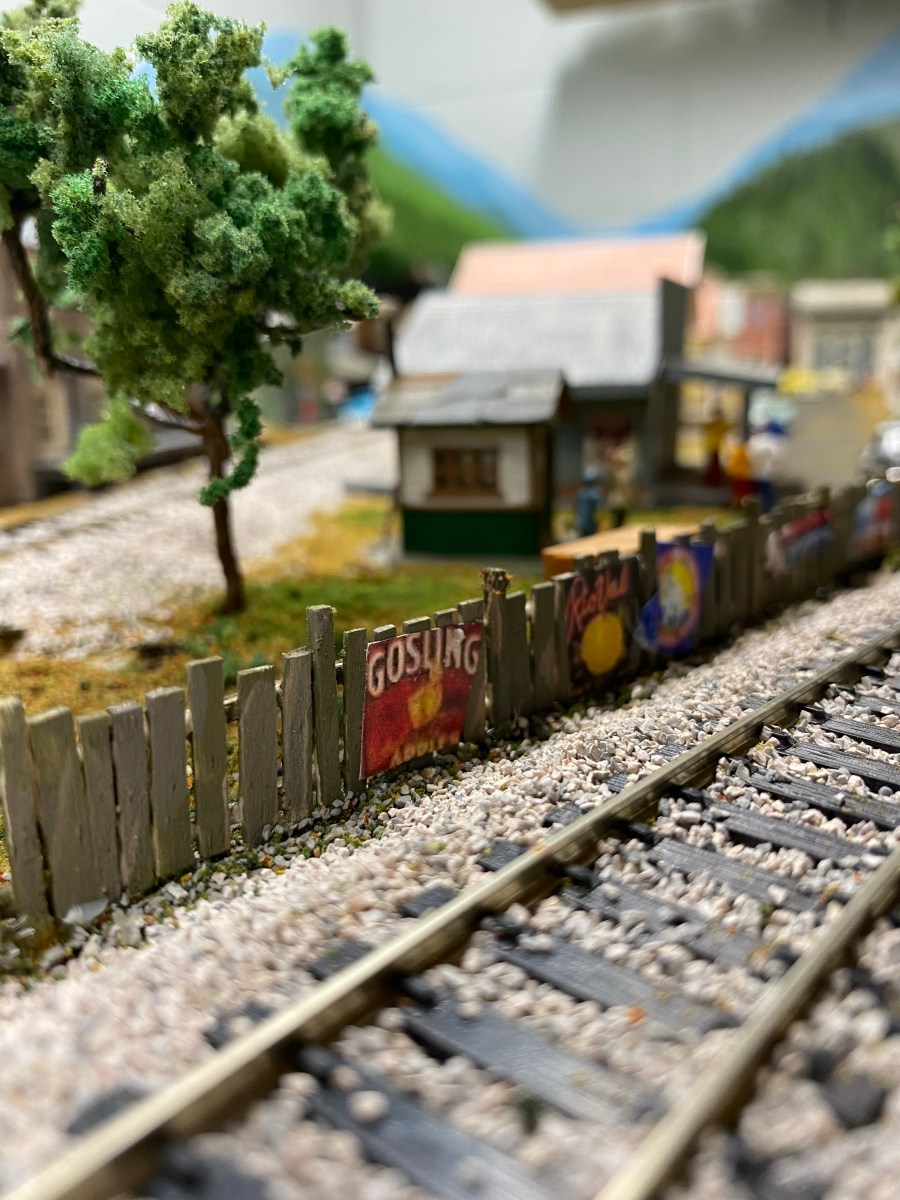
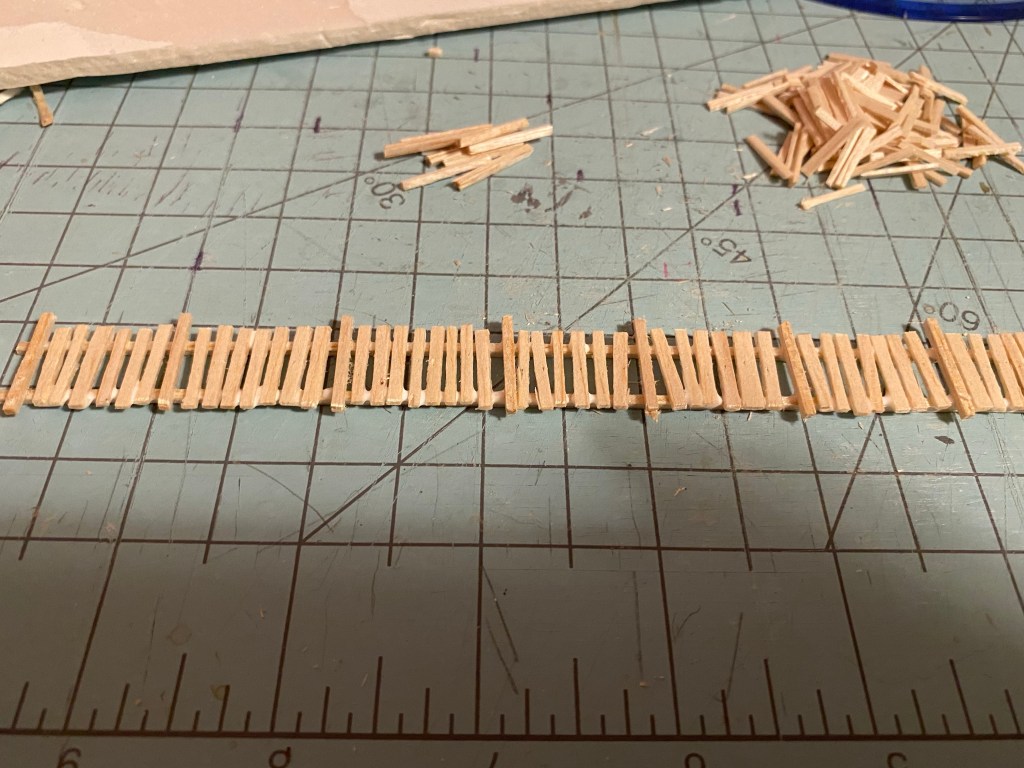
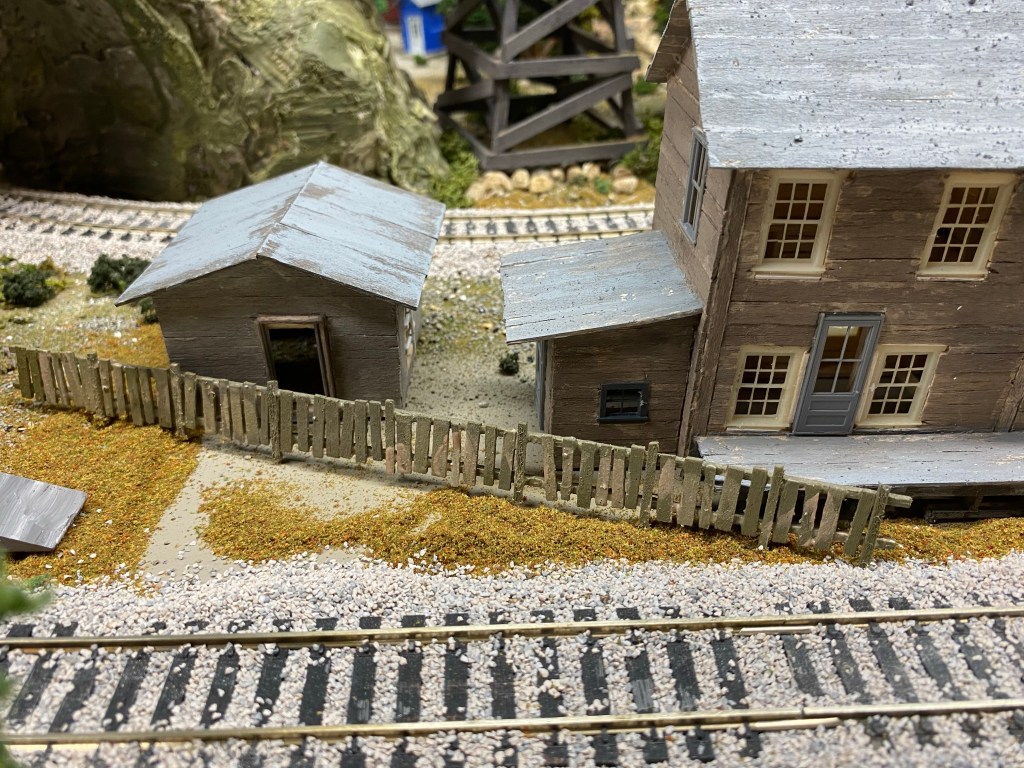
I decided to try my hand at making scratch-built picket fences. I found it to be a fun project and once I figured out how to do it, I kept making them. As you can see in the photo, I chose to make the slats irregular shapes and sizes.
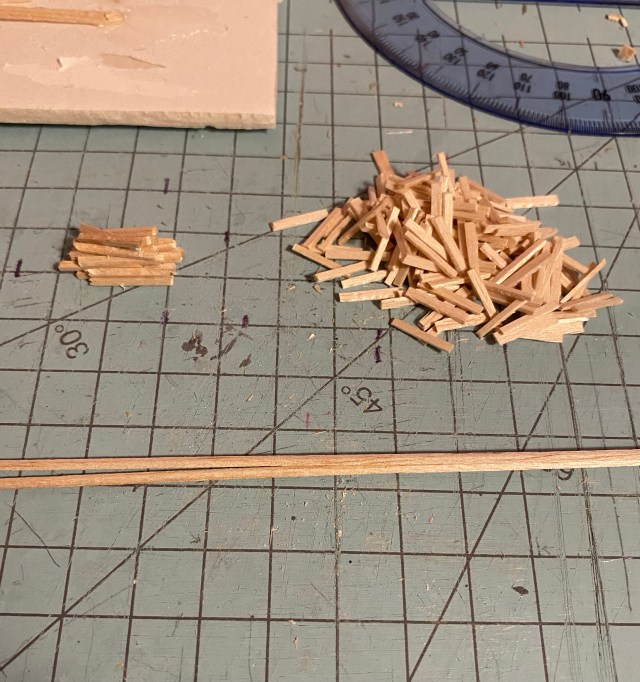
The fence pieces consist of rails, posts, and slats. The rails and posts are 1/32″ balsa material. The rails can be any length, but they should be the same. The posts are 5 scale feet long, cut from the same material as the rails.
The slats are cut from 1/32″ balsa sheet material.
The HO Scale ruler is a valuable tool. There are several measurement options on the ruler. I used it to measure all the fence materials, as I have for many other building projects.

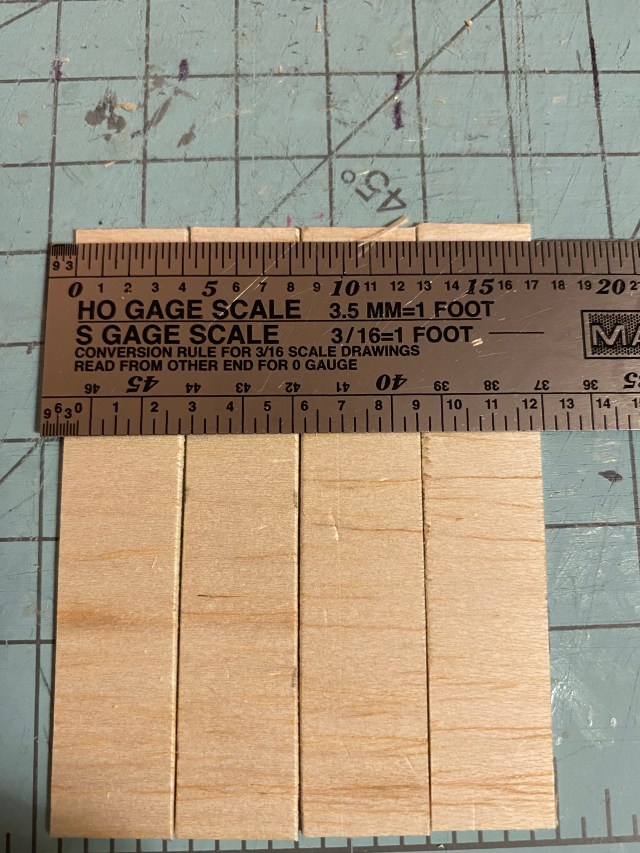
I measured 4 scale feet of 1/32″ balsa sheet material for the slats and cut four at a time. The first few fences I made had wider slats but I think the narrower ones look more realistic.


After cutting a sufficient pile of posts and slats, I laid the rails side by side and put a spot of glue at regular intervals across the entire length of the rails. I then separated them so the glue spots were directly across from each other. I carefully placed the posts on the glue, with the rails approximately three scale feet apart.
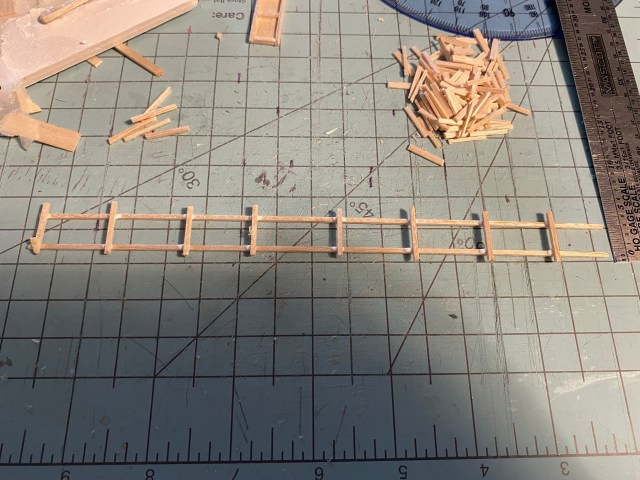
The “Original Tacky Glue” I use dries rather quickly, so after the posts are set, the work of gluing the slats to the rails can begin right away.
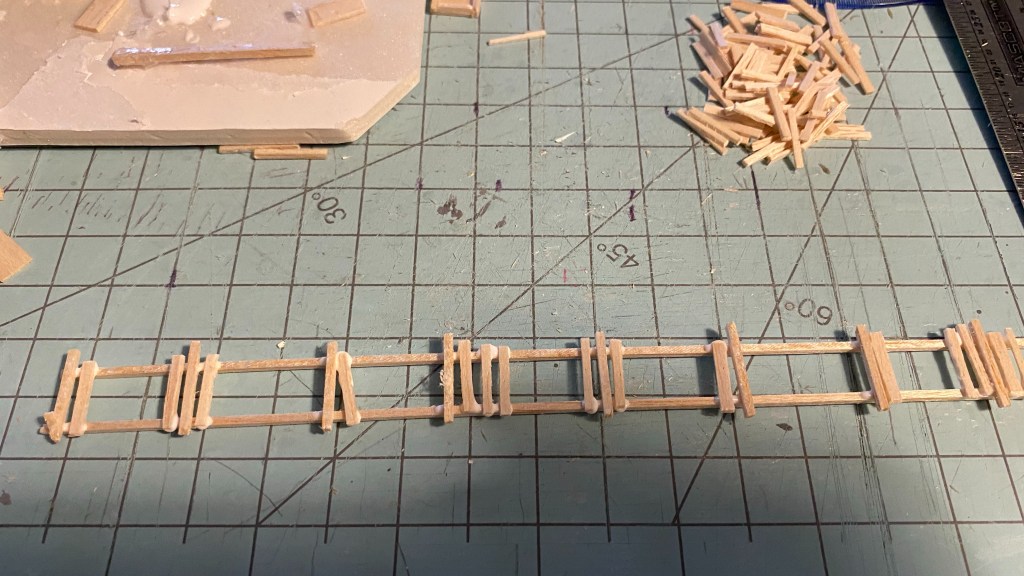
The process of gluing small slats side by side can be tedious, and requires great care to keep from covering fingers, slats, rails, cutting board and tools with glue. I found using my X-acto blade for poking the slats, dipping each end in the glue, and placing them on the rails a perfect way to do it. The only thing I was really careful about was not gluing too many of them straight.
When the glue has dried, it’s time for painting. I mixed some green, gray, and white acrylic paint, diluted with water, and stained the fences. To keep the fence from looking too uniform, I dabbed areas with various shades of color. I set the painted fences against supports to allow them to dry.
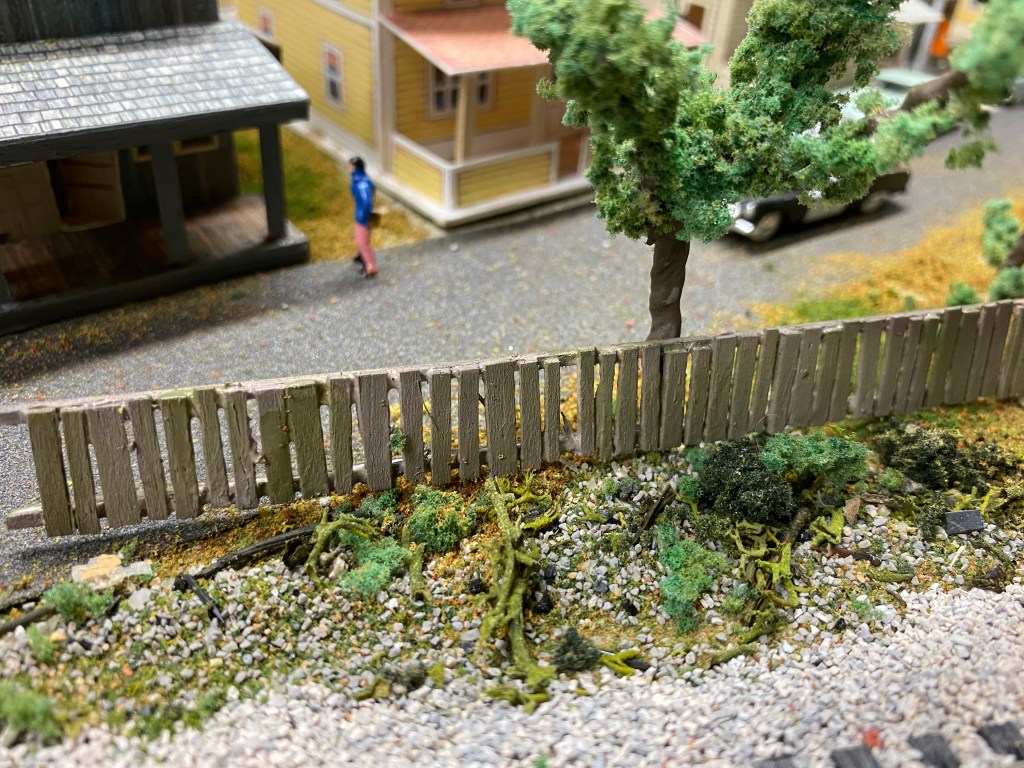
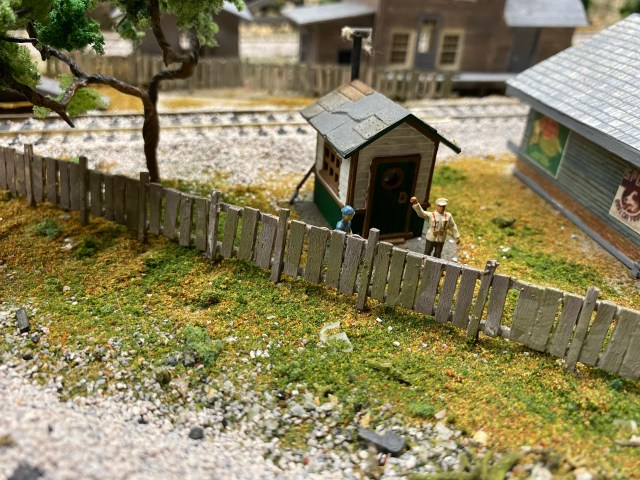
I love the look of old fences plastered with posters faded and worn by years of weather. I glue scale posters to all kinds of things. They can be scratched with a knife to make them look older, but I found the process of printing them caused enough distortion to make them look convincing enough.
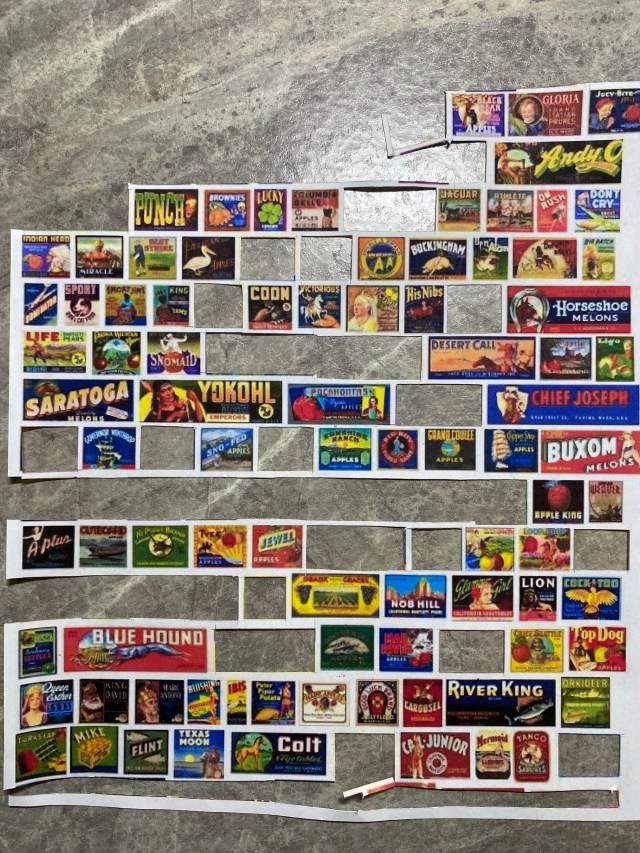
This is what’s left of the sheet of advertising posters I downloaded from a website. I’ve used them on several projects. The colors are great without being perfect.
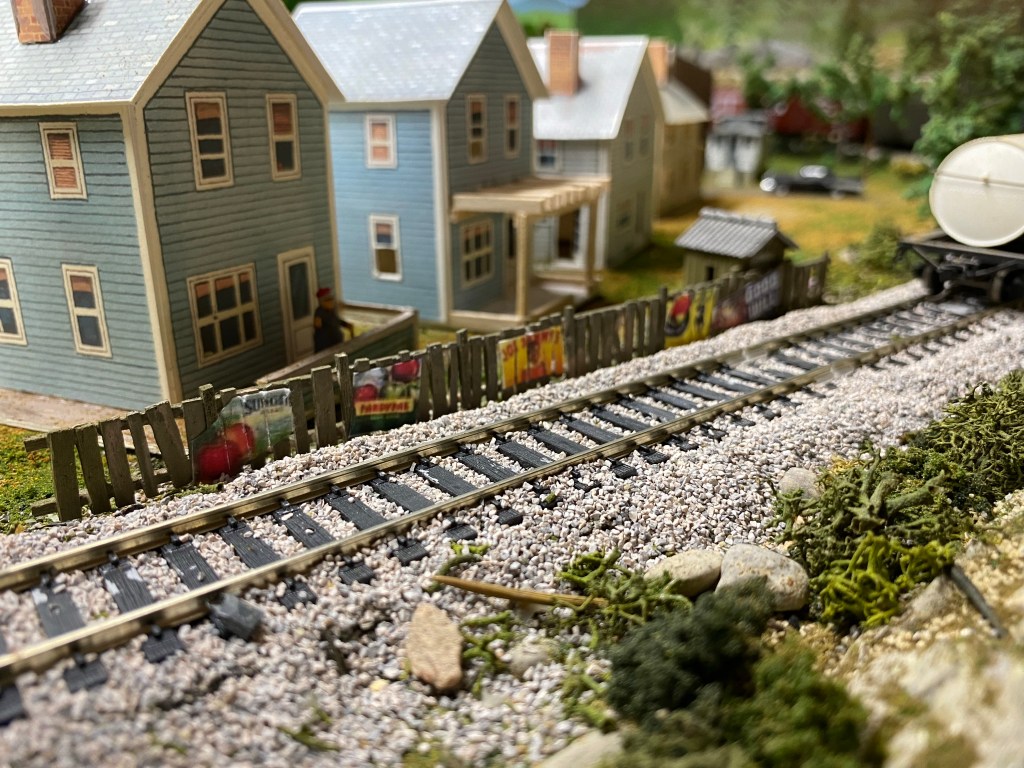
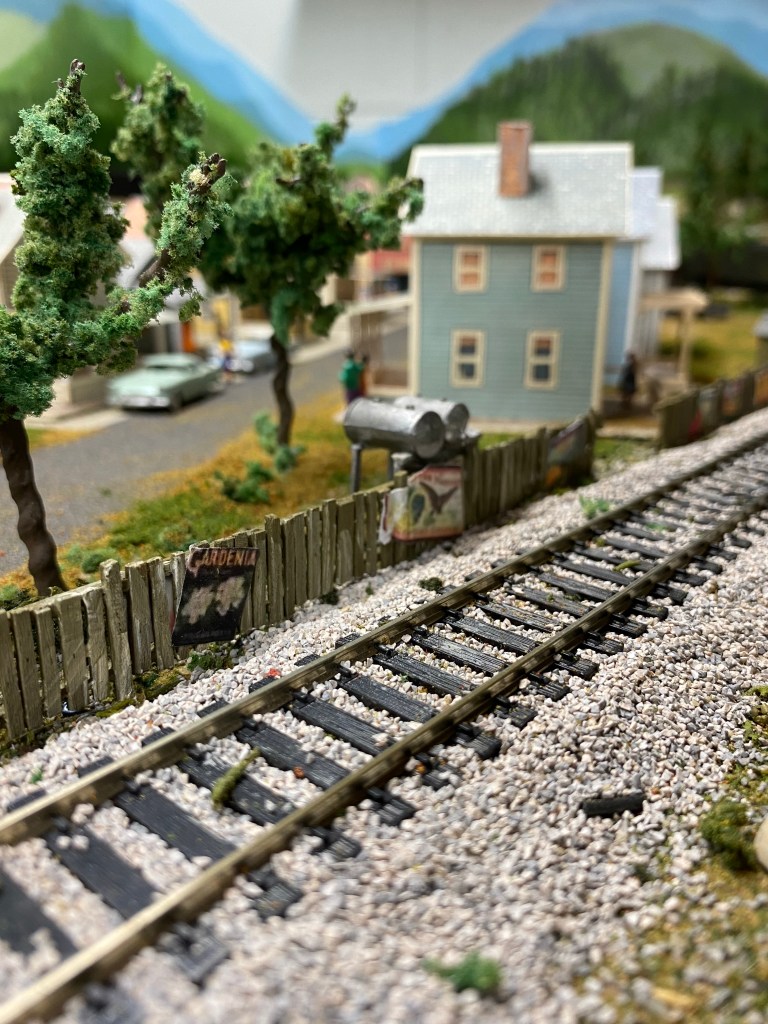
As I was careful not to glue the fence slats too straight, I made sure most of the posters were skewed. Of all the projects I have completed on the Maple Valley Short Line Model Railroad, my scratch-built picket fences are in the top two or three of pleasing results.

This is another fine example of a project going into the file named, “If I can do it, anyone can.”
