First, let’s get this straight. I am not an artist (and maybe you’ll agree when you look carefully at the photos of my backdrops.) The only time I have ever taken an art class was in the 7th grade. Mr. Nagle gave me good grades for my drawings but my interest in art didn’t grow. I have an uncle who is an incredible artist and taught art for many years. Our daughter is a gifted artist, and also teaches art. The talent skipped a generation.
My HO scale model railroad, The Maple Valley Short Line, is the most detailed layout I have ever created. It’s also the largest. The layout is shelf-style, twenty-one feet long, three feet wide in the middle sections, four feet-seven inches on the ends. The layout is still a long way from completion and I have already been working on it for three years. This layout includes my first attempt at painting backdrops.
The walls of my train room are cinder-block. I first painted the walls white, thinking that would probably be enough, as I did the same thing in my last train room. As my layout progressed, I realized I wasn’t going to be satisfied with white walls as a backdrop. Our daughter offered to paint the backdrops for me, but I was determined to do it myself. If it turned out terrible, I would live with it, somehow. If it turned out great, then so be it.
I first considered painting directly on the walls, but decided the mortar seams between the blocks would be too obvious. So, my next task was deciding what kind of material to use as a canvas. I bought poster-size thick paper but my daughter said it would buckle. I decided to use foam-board. I had no idea how foam board would respond to acrylic paint, but I knew I didn’t want to mess with oils.
I didn’t trust my artistic imagination enough to come up with convincing mountain scenes, so I went to the single greatest source of everything you can possibly need. Google. Since my layout has a rocky/mountainous landscape, I used photos of the Smoky Mountains as my examples to paint. I was not surprised there are innumerable pics of mountains on Google, but I wanted a particular look with mountain ranges close up and miles away. I found fifteen, or so, pictures I was happy with and used them as my inspiration.
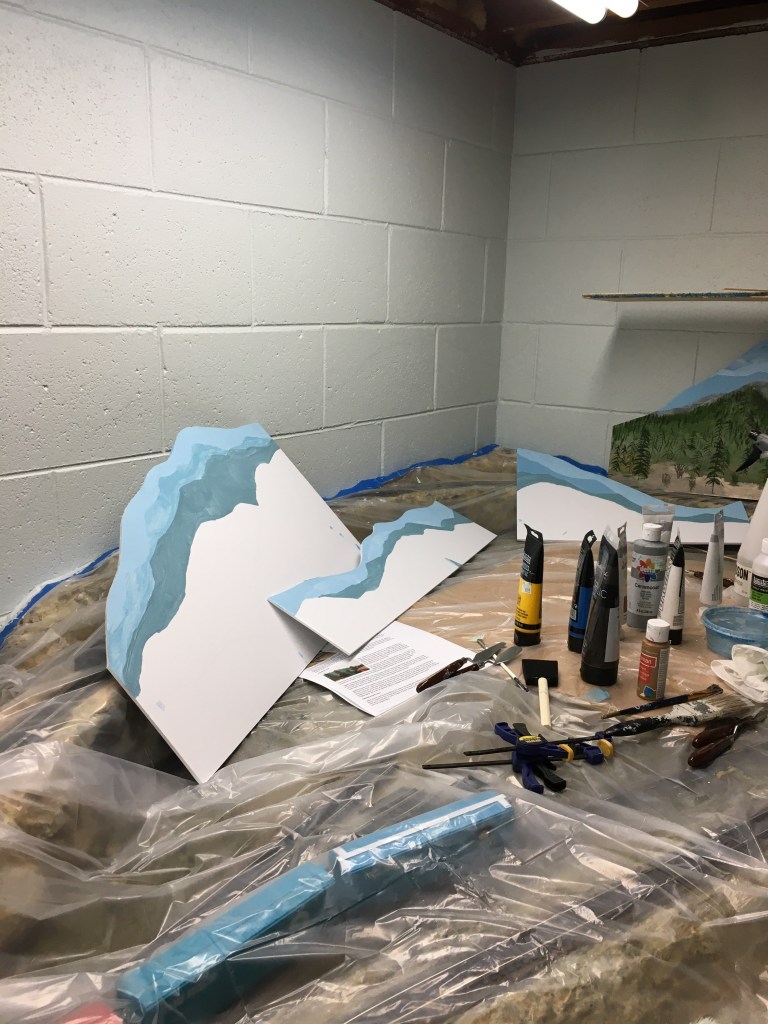
I first tried laying paper over my computer screen and tracing the outline of the mountains. That idea didn’t last long. I was left with freehand sketching, which is what I was most afraid of, and for good reason. I have battled with essential tremors for many years, and they seem to be getting worse. I’m left handed, but had to teach myself to be right-handed. I was not at all certain I could do anything more than make a mess, painting with my right hand. Through a combination of left and right-hand painting, I was able to get the job done. Some trees look better with my left hand, others look better with my right. I don’t know.
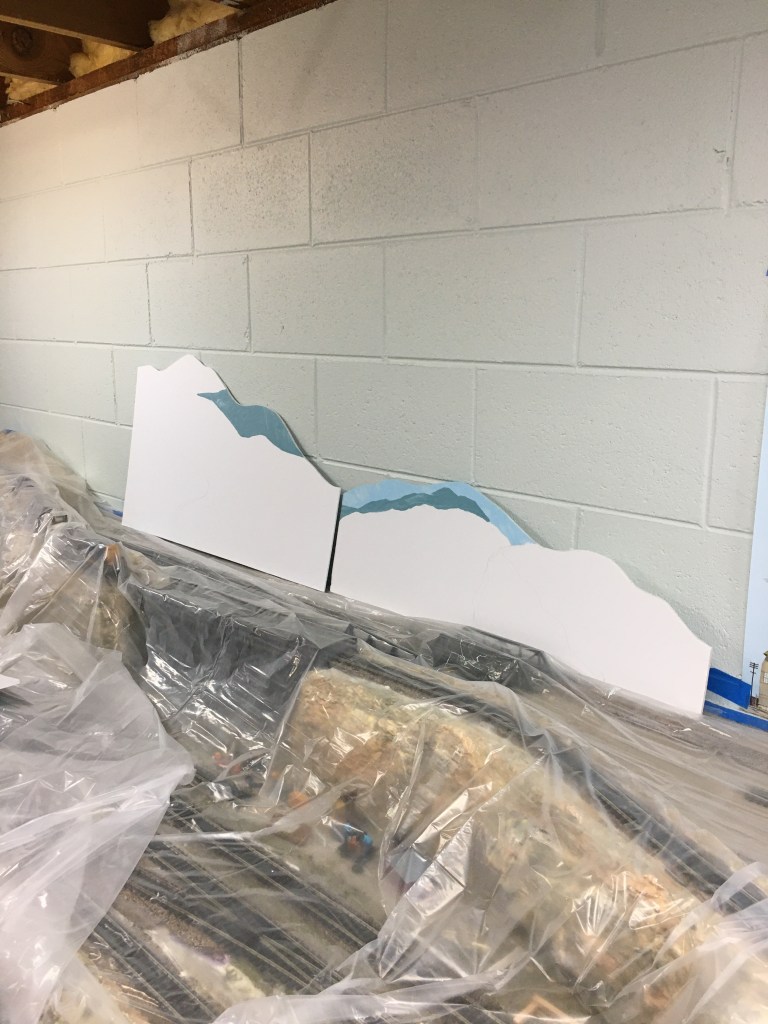
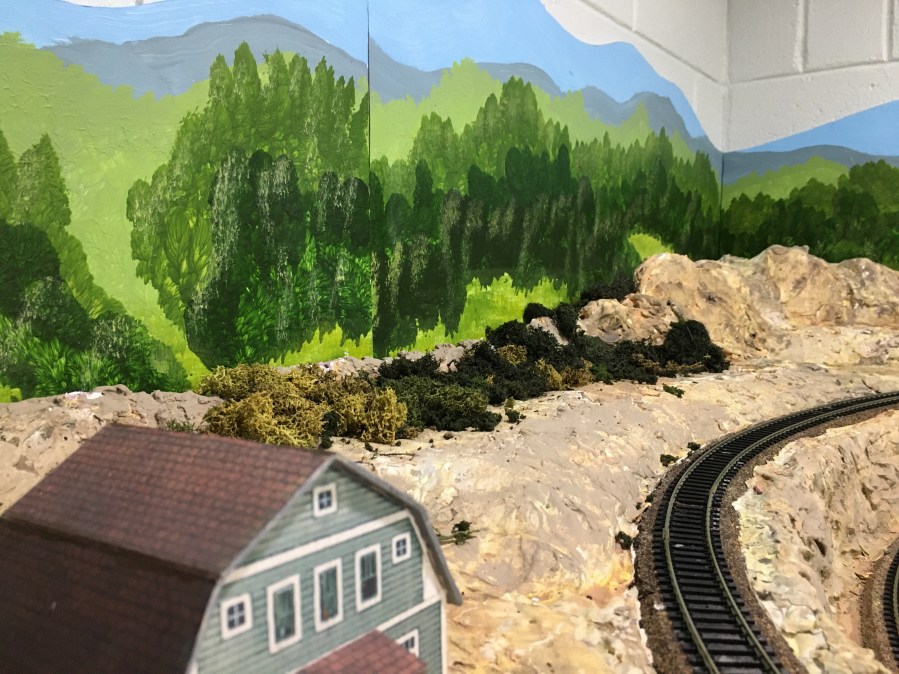
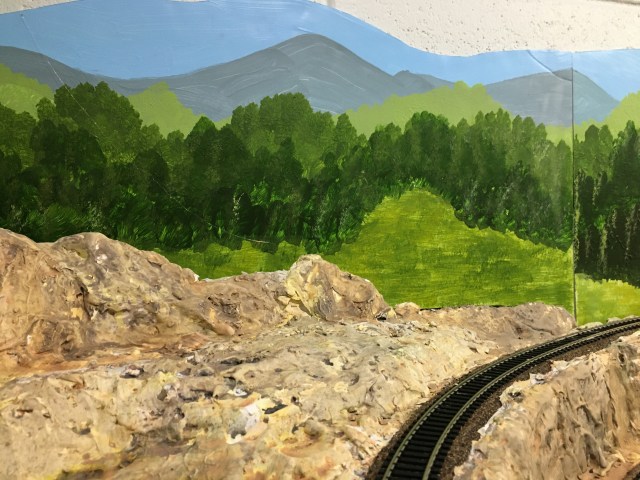
A great decision I made was cutting the foam board to follow the outline of the most distant mountain range, leaving enough space to paint sky above it. To get the desired effect, I had to be sure the outlines of the mountains were NOT consistent with each other. For the right effect, there has to be an appearance of distance between the mountains, which is accomplished by the shades and darkness of the paint colors. Lightest colors are the most distant mountains, darkest are the closest. Tree detail is most visible close-up, detail fades as distance increases.
How did I learn all of this? Through the miracle of YouTube! You can learn almost anything on YouTube! I watched many videos of people painting backdrops. (I have to say, however, there are many unhelpful videos in which the person spends most of the time talking rather than demonstrating. And still other videos are more an example of how not to be a comedian than how to paint a backdrop.) Enough complaining.
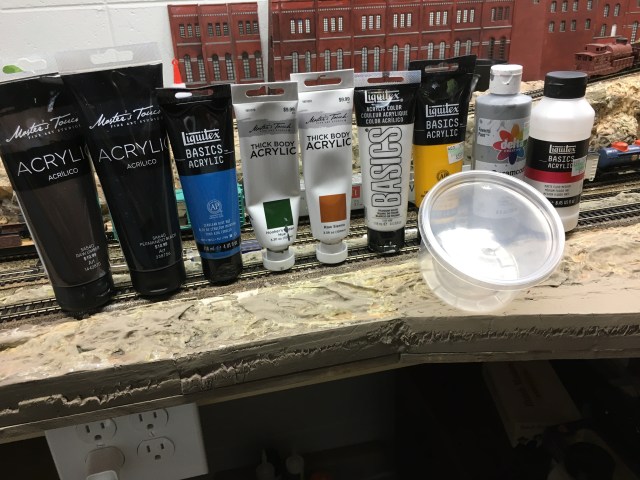
In the videos I learned there are several colors consistently used for backdrops. Raw Umber, Permanent Black, Cerulean Blue, Hookers Green, Raw Sienna, Titanium White, Cadmium Yellow, and Matte Fluid Medium, which is used to thin and make the paint go farther. You will also use several plastic containers with lids, and several different kinds of paint brushes.

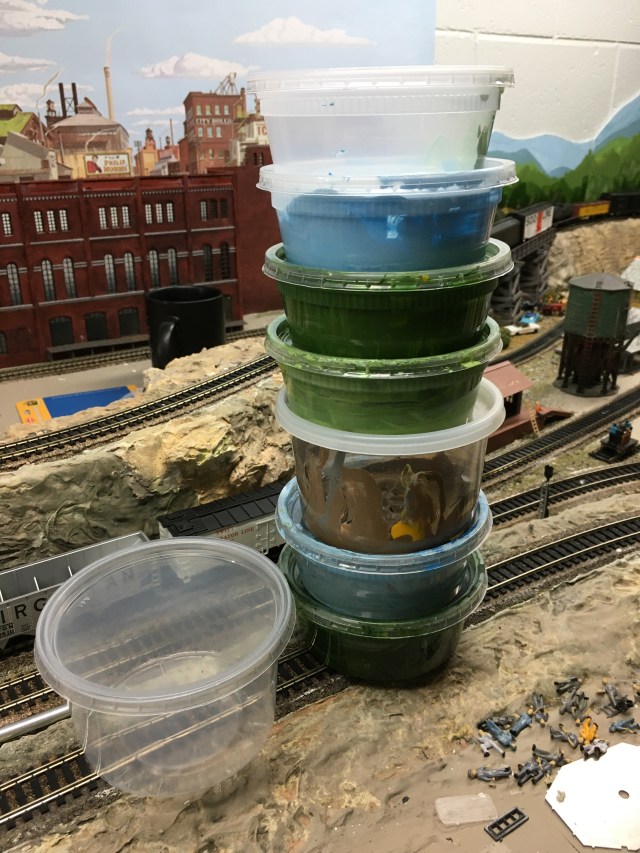
The secret to painting great backdrops is believing you can do it, then working with the colors until the mixtures are exactly what you want. Be patient, don’t try to paint too much at one time. Give the layers plenty of time to dry. Keep the vision of what your layout will look like in front of you.
In the next post, I will include the details of how to paint in layers and how to make distance come alive in your backdrops.

Pingback: More Trees for the Maple Valley HO Scale Model Railroad – A Coffee State of Mind