One of the beautiful things about model railroading, and scenery in particular, is that beauty is in the eye of the creator. If you think it’s incredible, then it is. We all like to be told our work is terrific, but the truth is you are the only one to please.
I pondered backdrops for a long time before I actually started working on them. In fact, I kept putting it off because I just didn’t think I could do it. In addition to having no real artistic talent, I have a condition known as essential tremors. If I hold my hands out in front of me it’s difficult to see any trembling. But the minute I try to do something small or detailed, like just signing my name, I have difficulty controlling my hand.
I considered painting right on the cinderblock wall but finally decided against it. I was afraid the mortar lines would show too much. I also thought about using posterboard. Our daughter, the real artist in the family, said the posterboard would wrinkle. I used foamboard which has a very smooth surface and it is about 3/16 of an inch thick, which gave the paintings a little bit of extra depth.
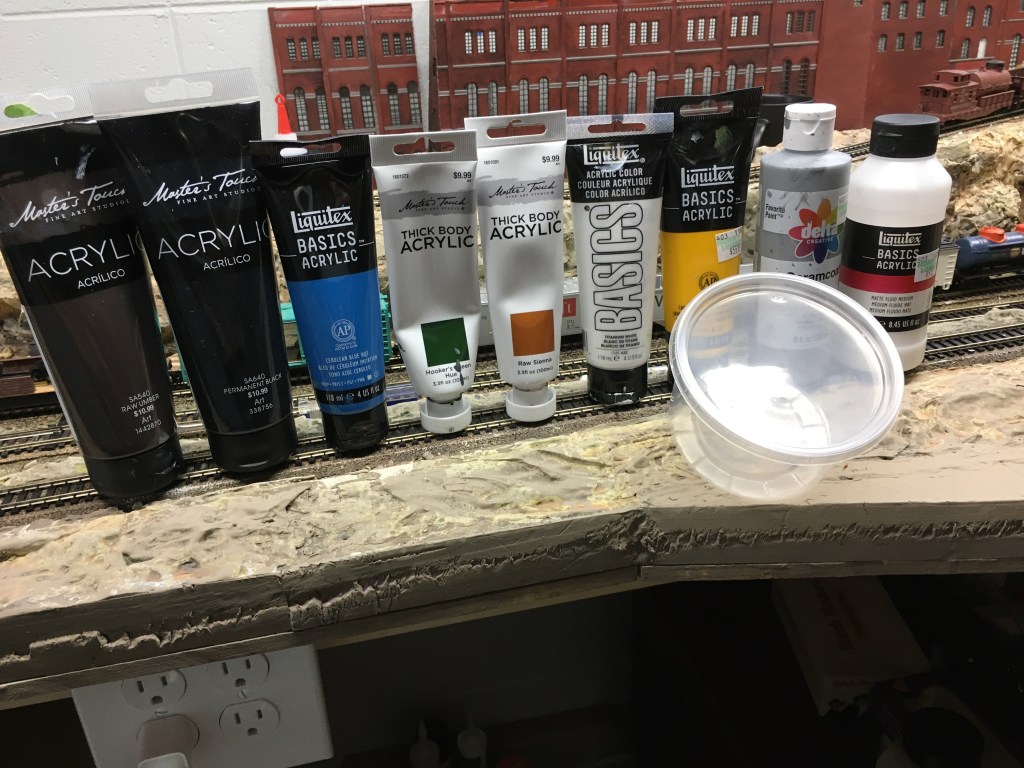

As I said, I’m no artist. Thank heavens for YouTube! I found a basic list of acrylic paint to use on my backdrops. I collected a bunch of platic containers with lids because I knew there would be a lot of mixing involved.

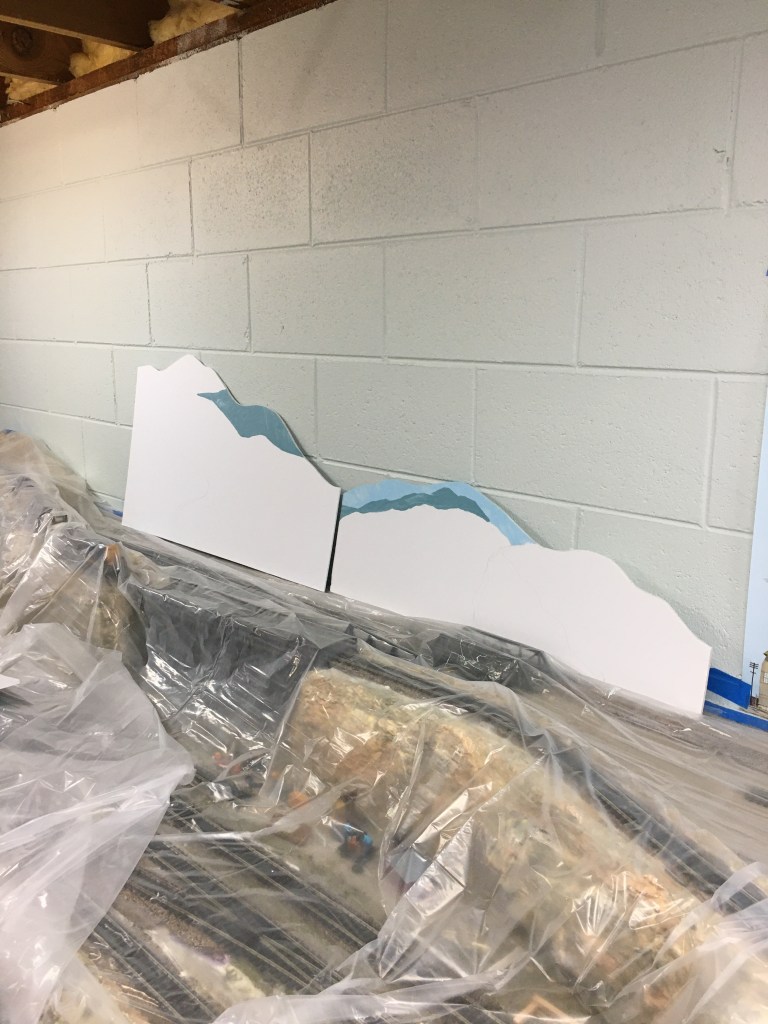
I began by deciding how high I wanted my backdrops to reach. My model railroad terrain is a blend of mountains, hills, and rocks. I didn’t want the backdrops to overpower the scenery in front of them. I drew a rough pencil outline of the mountains on the horizon. I then cut the foam board in the same general outline, and inch or so above the pencil line.
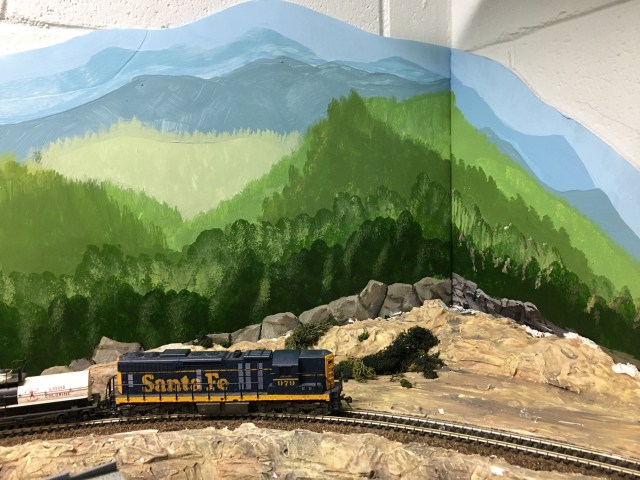
I used a light mixture of blues and titanium white with some matte medium to prevent a glossy appearance, and painted sky in varying depths along the top of the foam.
The first layer of mountains on the horizon is a gray-blue mixture to promote the illusion of distance and haze.
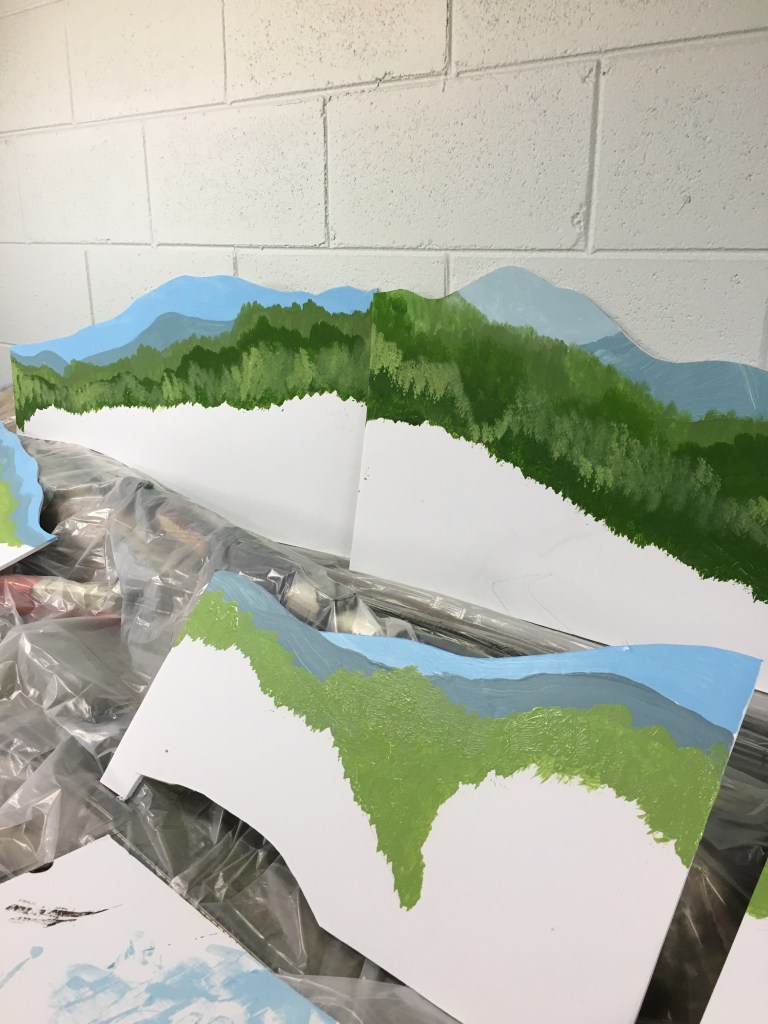
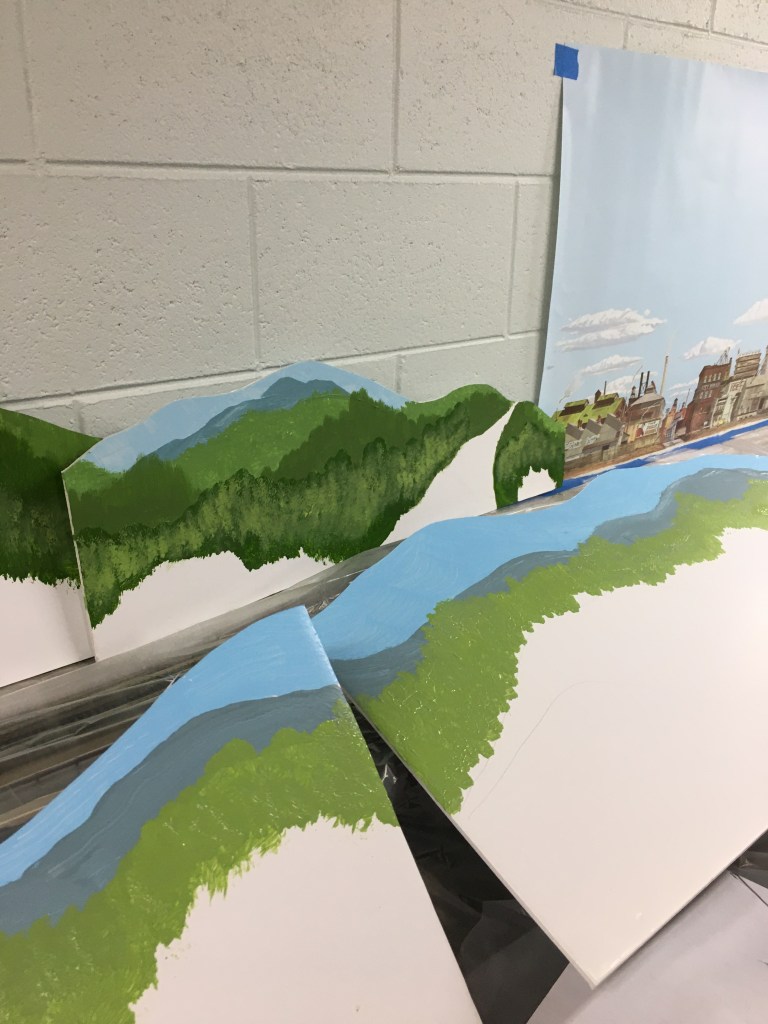
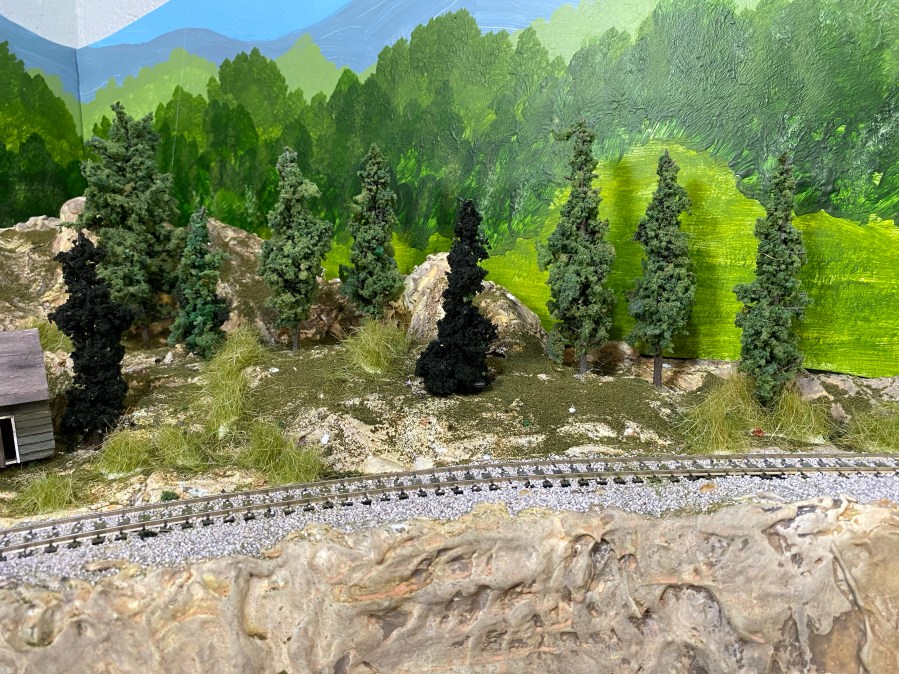
The secret to creating distance is to remember the most distant areas are the lightest. Each layer of color is gradually darker as the trees get closer. For forest areas, the greatest distance is the lightest green. Be careful to avoid following the same outline as the color above it. Don’t hesitate to allow part of a color layer to rise above the edge of the color behind it. In the middle photo, the outline of the treetops rises above the outline of the mountains behind it.
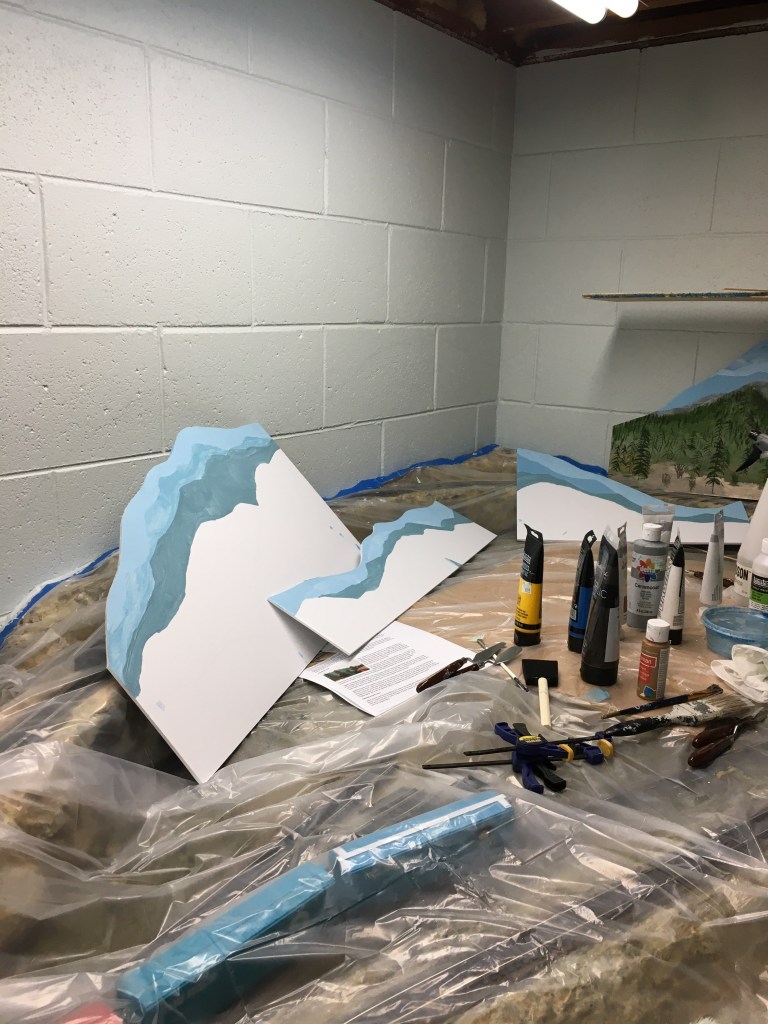
Experimenting with color mixtures is the best way to create the scene most pleasing to you. Use some scrap foam pieces and paint some mountains and trees. Let the paint dry, then start on the real thing.

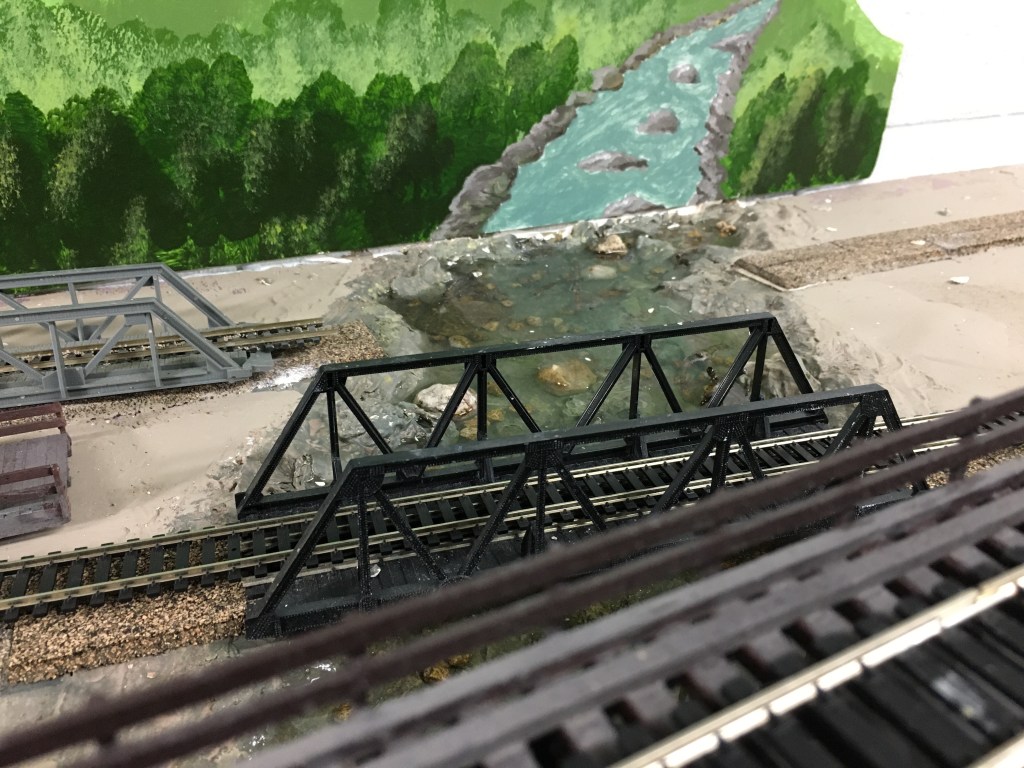
A real challenge for me was painting a river to connect to my Maple Valley River running under four bridges, including my scratchbuilt trestle. I put that job off as long as I could. For non-artists like me, a little practice with vanishing points is necessary. A vanishing point is the spot on the horizon where all lines meet. If you stand on a road and look to the horizon, the road seems to disappear, although you know the road is just as wide four miles away as it is where you’re standing. Where the road disappears is the vanishing point.
The white inverted “v” shape in the photo above is the area will the river is painted. The wide area in front is closest to the viewer. The narrowing will indicate distance.


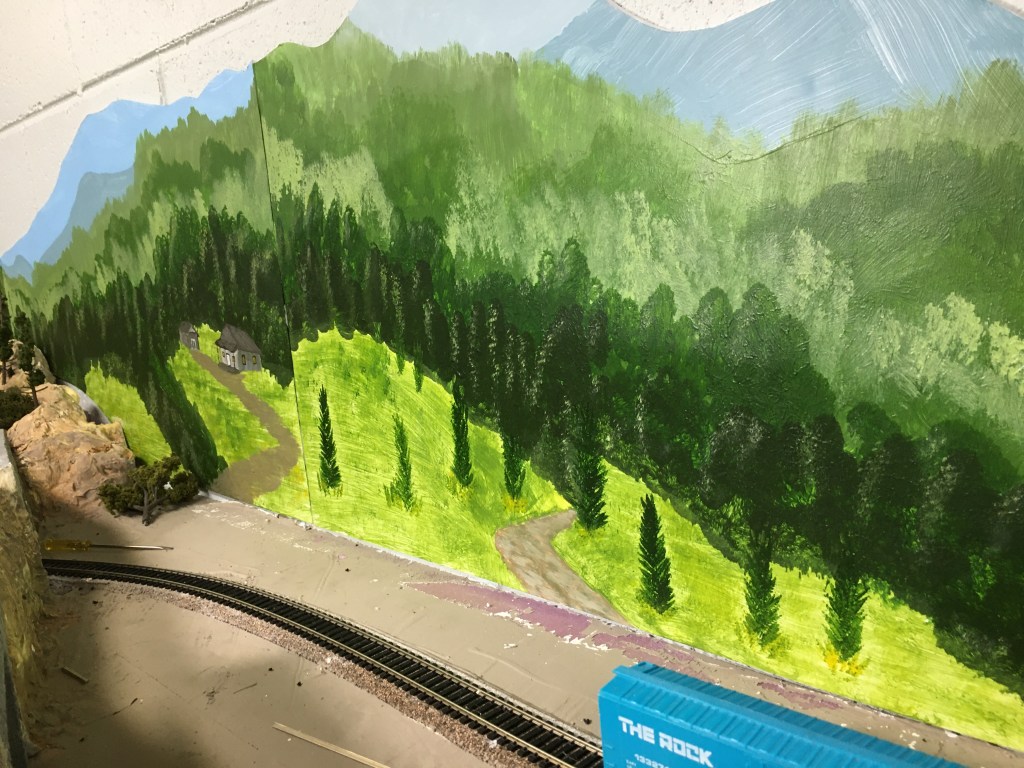
Another trick to help create the illusion of shape and distance is to indicate a light source. By dabbing some lighter paint on the left side of the trees, it appears as if the sun is shining from the left. All light source direction shouild be consistent throughout the paintings.
Painting individual pine trees was another learning experience. I started with a straight line with brown paint. Using a fan brush, I dabbed a green mixture unto the trunk on each side. Larger branches at the bottom, smaller at the top.

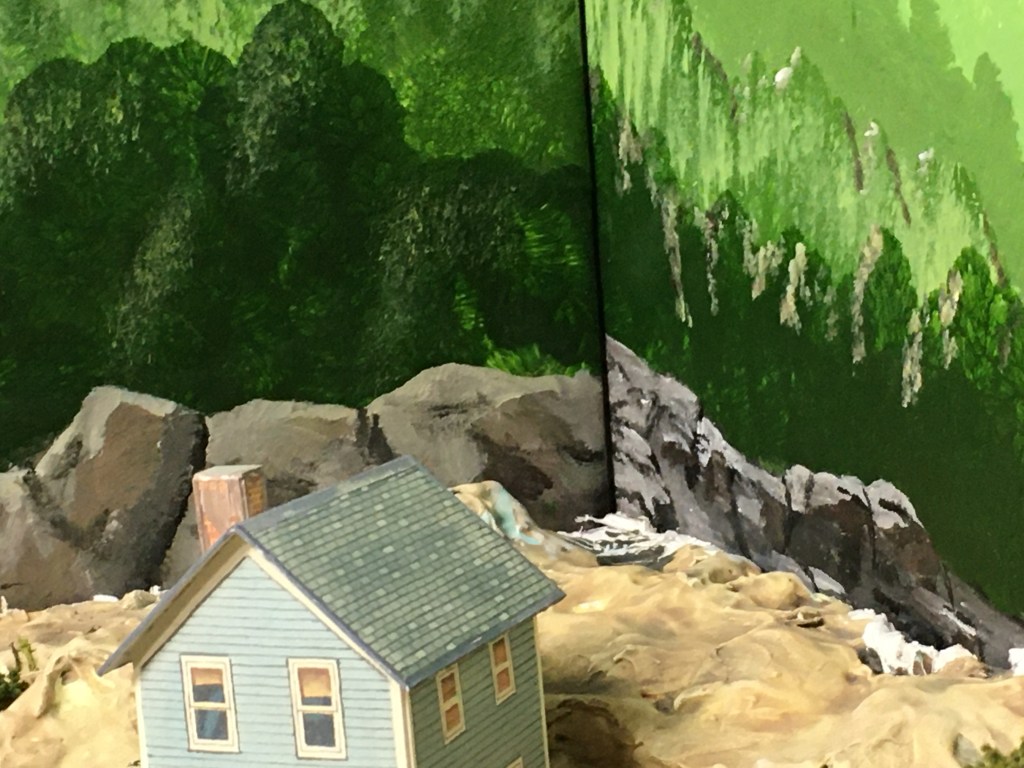
I tried my hand at painting a cabin in the woods. The road leading to the cabin has some distance by being wider at the bottom, narrow at the top. The cabin and shed lines also have vanishing points to eliminate a flat appearance.
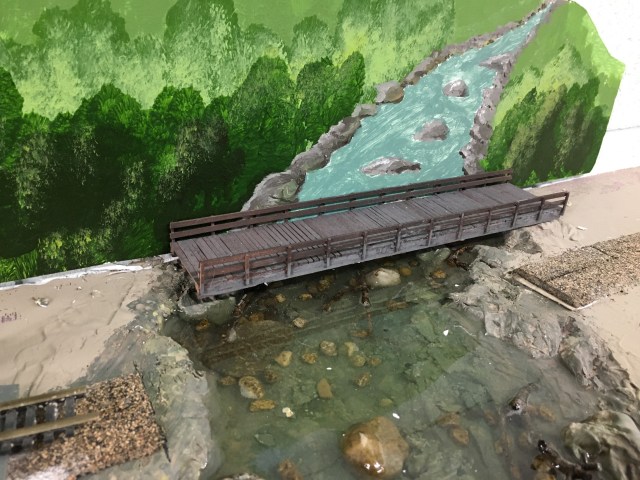
I’m happy with the final outcome of the painted river meeting the epoxy river at the back of the layout. The bridge will carry vehicle traffic. I removed a track girder bridge to give a clearer view of the river.

To make corners less noticeable, it is important that color layers match. Different shades of green meeting make corner lines more obvious.
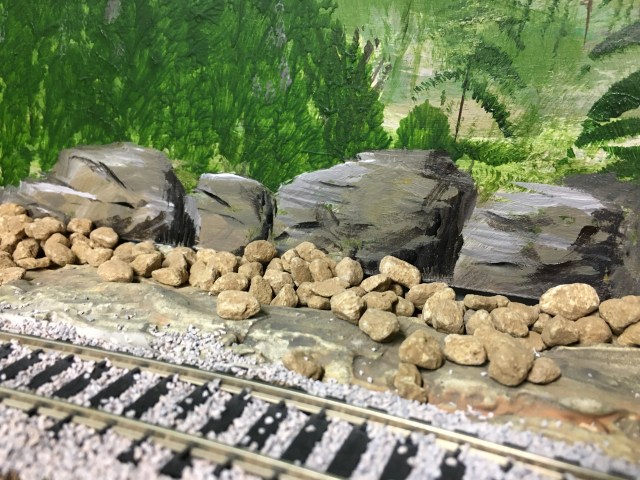
I am really happy with these rock formations. The shading definitely gives the appearance of a light source on the left and shadow on the right, also giving the illusion of depth. For an audience of one, I am thoroughly pleased with the artwork.


The Maple Valley Short Line Model Railroad backdrops are complete. I did have one hiccup after the painting was finished. The foamboard curled when the paint was completely dry. I placed the foamboard, paint side down, on the floor. I placed a straight-edge on the foam board perpendicular to the direction of the curl. I pulled the foamboard up, making a slight crease. I was afraid the paint would crack, but it didn’t. The effort straightened the boards and they were ready to be glued to the wall.
I glued the paintings to the wall with a hot-glue gun. I placed the boards on the wall to mark exactly where they should be positioned when glued. I worked quickly after applying the hot glue to keep it from drying and hardening too fast.

Dale! Are you sure you aren’t the artist of the family? It’s all so beautiful and I’m ready to hop the train and see the views on person (I’ve taken the Durango/Silvertom train many times due to this love!). And with a trembling hand? Bravo! 🙌🏻
LikeLiked by 1 person
Thanks so much for your kind comments. Actually, I have an uncle who is an incredible artist. Our daughter is a middle school art teacher, her work is amazing. Maybe sometime I’ll do a post about her work. I’ve watched videos of the Durango/Silverton train. Our claim to fame in Michigan is the Pere Marquette Berkshire steam locomotive that was used in the movie “Polar Express.” We’ve ridden their excursions a few times. Love it.
LikeLiked by 1 person
You’re welcome, Dale! It seems art runs in the family; super! I love the middle school. I’m no artist, but I spent 8 years as a middle school principal during my career–and I can share that hanging with the art teachers was always the best! The Polar Express–wow! That’s perfect! Here in Branson, Missouri they have a Polar Express themed train ride on our Branson Scenic Railroad. Right now the song, “Hot, hot, hot!” is definitely true! Take care!
LikeLiked by 1 person
Wow, that’s awesome. My wife taught 7th graders for twenty-two years, I was the middle school counselor for five years before retiring. We were all in the same building for five years. It was a blast. Best to you.
LikeLiked by 1 person
That’s awesome, Dale! We’re kinda like family right?! 😀 I should’ve been a counselor! I wanted to teach history like my Dad. Special education is my background. My best to all of you! Thank you ALL for your service! 🙌🏻
LikeLiked by 1 person
Nicely done! I learned a lot and will show this to the lady that will be doing my backdrop. I cannot draw a glass of water from a faucet, let alone do the backdrop! Thank you for posting this!
LikeLiked by 1 person
Hahaha! That’s a line I’ve not heard before! Thanks so much, my pleasure. Glad you found it helpful. I don’t take credit for any of it. I watched a dozen YouTube videos before I attempted painting. I just tweeked others’ techniques a little to make it work for me. Good luck with your backdrops.
LikeLike
You did an awesome job on your layout Dale. For not being an artist you learned a lot. I did too reading your blog. Loved it.
LikeLiked by 1 person
Thanks Aileen. I watched a bunch of YouTube videos, and Becky told me a lot.
LikeLike
Pingback: More Trees for the Maple Valley HO Scale Model Railroad – A Coffee State of Mind