Are you dreaming of building an amazing HO scale model railroad? If so, I can help you get started on a great shelf-style layout to make your dream a reality. In this post, you will learn important steps for building a strong foundation for your layout.
There are several styles of benchwork used in model railroading. A shelf-style layout has become my favorite and is the plan I will be discussing here.
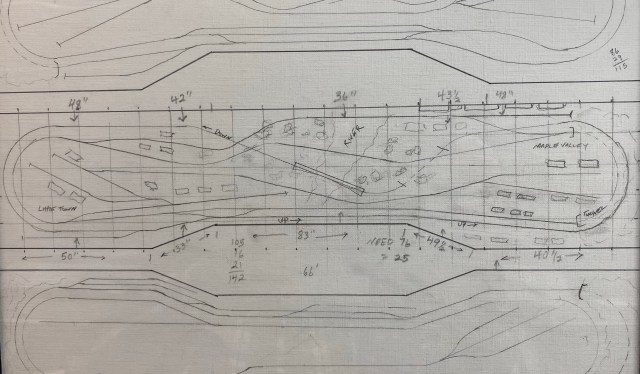
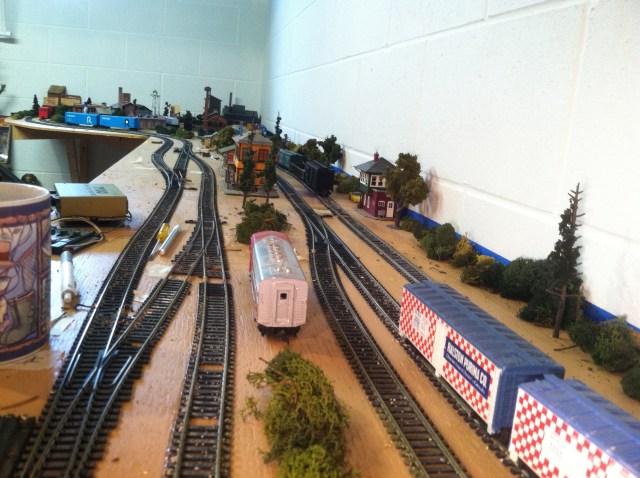
My Maple Valley Short Line Model Railroad is a shelf-style layout. The railroad is 21 feet by 5 feet at the ends. Benchwork is attached to and supported by a wall, which by definition makes it a shelf layout.
My first layout was an L-girder, L-shape, stand-alone structure. The benchwork was 18 feet by 10 feet with a depth of 4 feet. While this type of benchwork made access to the entire layout easier, I now prefer a shelf-style plan.
My second layout was 18 feet long, and 4 feet deep on the ends. A 24 inch depth in the middle sections worked well. It was a simple shelf layout without much character.
Why Is a Shelf-Style Layout the Best Choice?
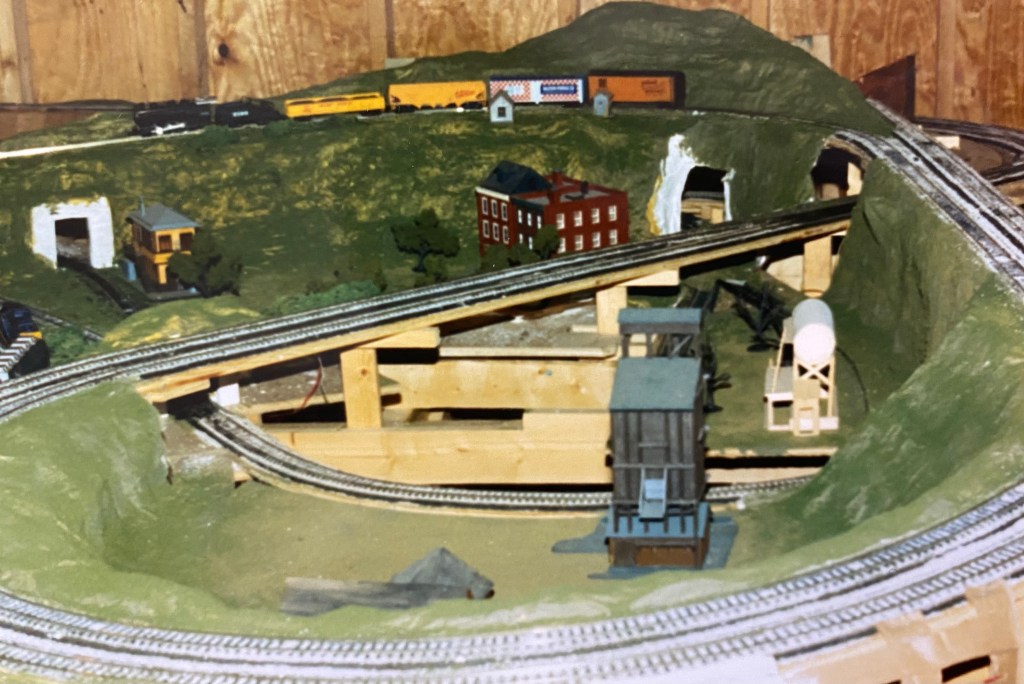
The Maple Valley Short Line Model Railroad is in its sixth year of construction. The layout is fascinating, with more detail than I have ever used before. I run two trains continuously and have several spurs for local operations. Even though the layout is completely functional, I will always be working to add more detail. A shelf model railroad is best because all layout scenes are easily visible.


Four Critical Steps for Shelf-Style Benchwork
Benchwork is the most important part of any model railroad. Shelf-style benchwork is the most critical of all.
Four critical steps to remember while you build shelf-style benchwork are:
- Build strong brackets for weight support
- Make solid wall connections
- Plan for track curve radius
- Make all girders level
Build Strong Brackets for Weight Support
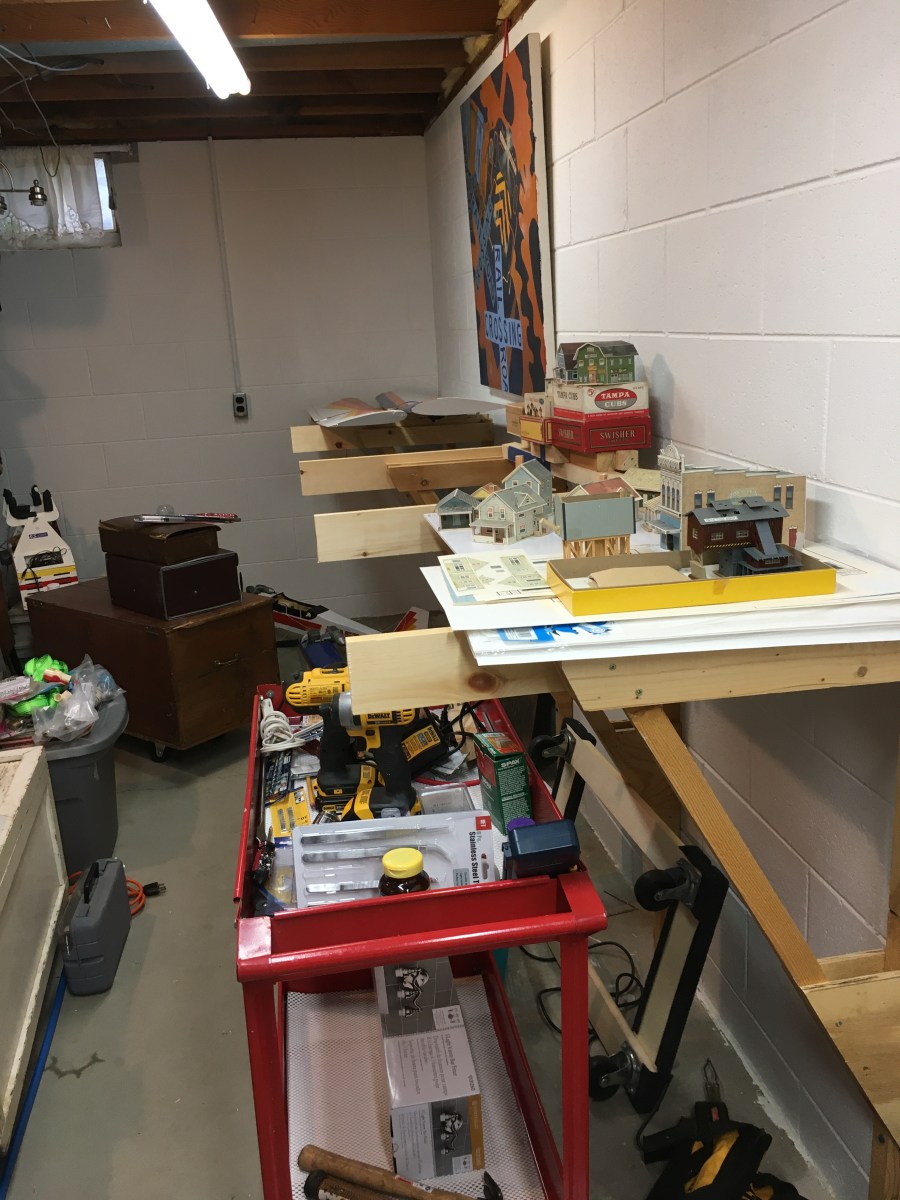
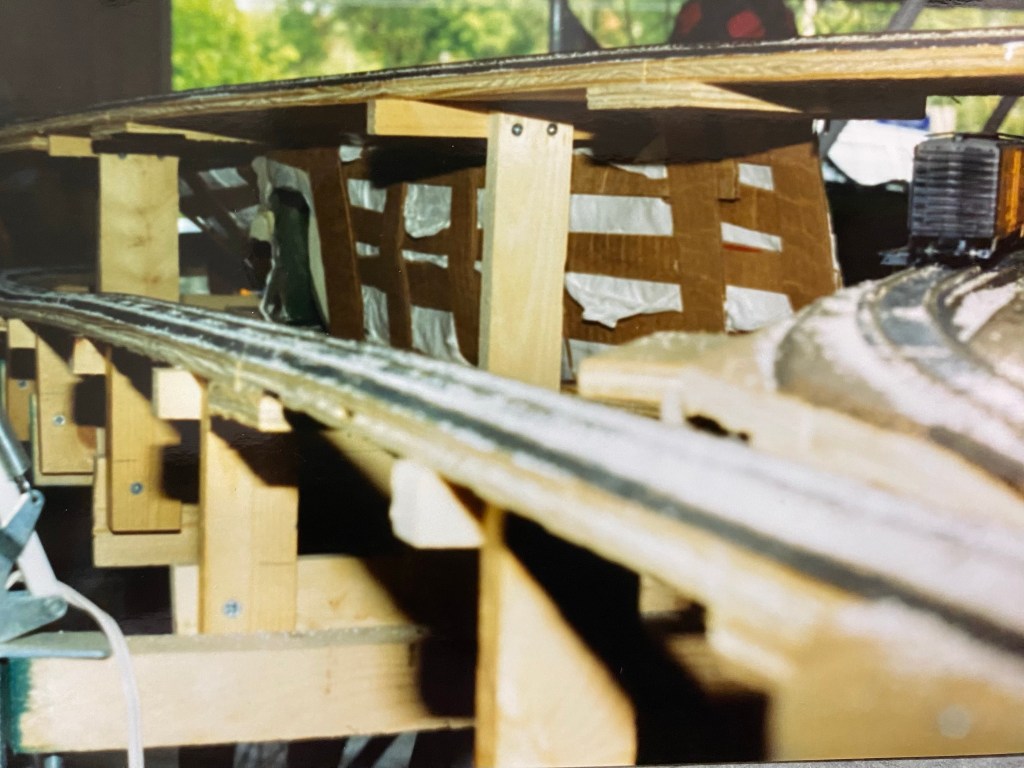
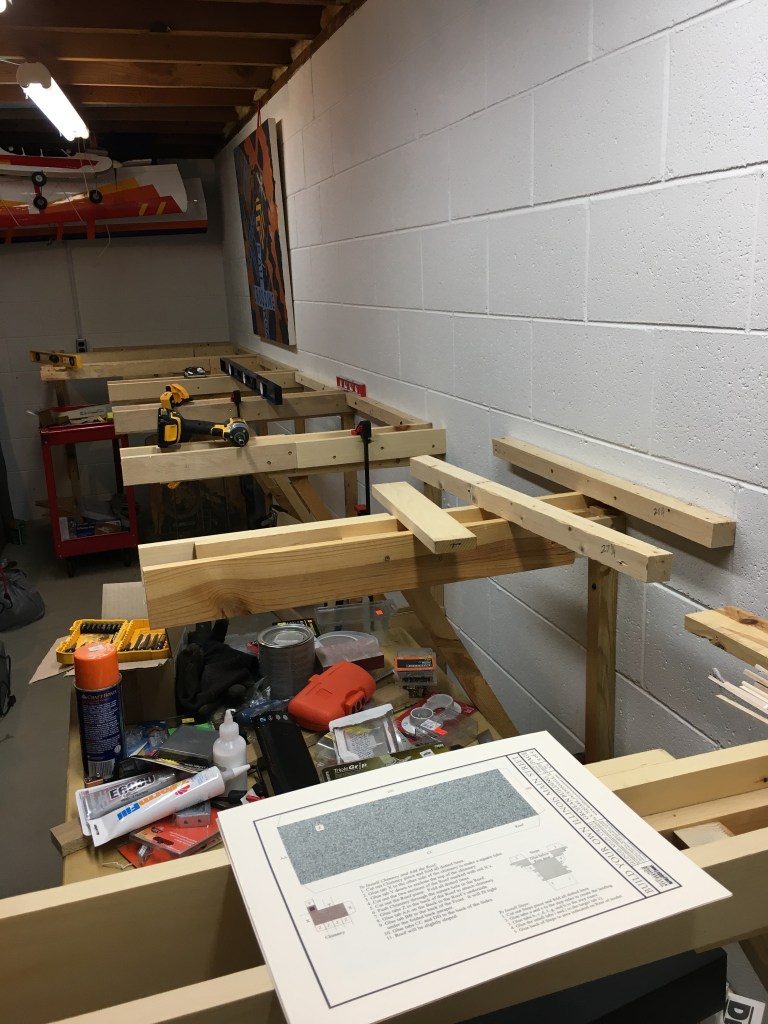
I used 1 x 1 inch pine legs and braces. The legs rest on the floor, the tops are below the top edge of the girders. I cut several 1/4 inch plywood gussets, Gussets are the triangle pieces attached to the legs and braces. The length and angle of the braces depend on the depth of your bench. If you build a switching layout with a bench depth of fourteen inches, your leg-to-brace span will be much shorter. The size of the gussets also depend on the depth of your bench. I used 1 x 4 inch pine girders, attaching two to each leg and brace. The girders extend to one inch from the outer edge of the layout.
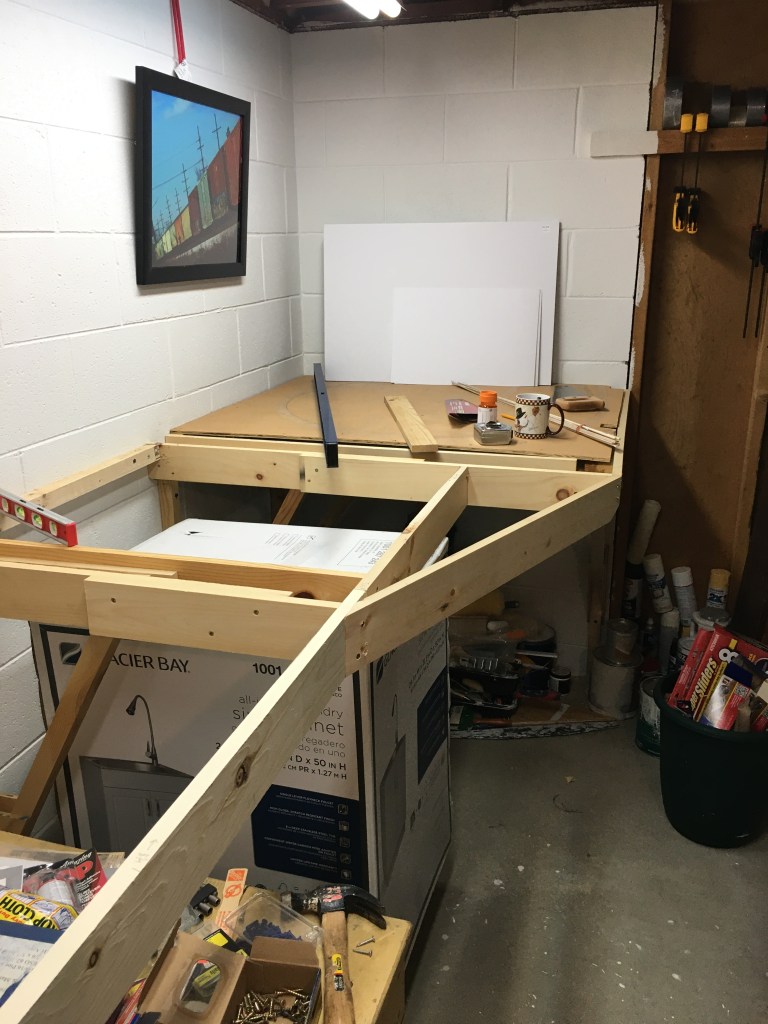
Make Solid Wall Connections
Legs will easily attach to wood studs using 4 inch cabinet screws. Connecting legs to masonry is a little more difficult.
- Drill evenly spaced holes through the 1 x 1 inch legs.
- Mark holes on the cinder block wall.
- Drill holes in the wall using masonry bits.
- Firmly attach bracket legs to the wall with masonry screws.

My biggest challenge was completing perfect curves on my HO scale model railroad. The strong shelf-style benchwork easily supports my weight.
Plan for Track Curve Radius
The Maple Valley outer line has 52 inch curves, or a 26 inch radius. This is the one disadvantage of a shelf-style layout. With a depth of 5 feet at the ends, I couldn’t reach the entire curve. I climbed on top of the bench to finish the curves with flex-track. You can learn more about building perfect curves using flex-track here.
The enemy to smooth train operation is kinks on the curves. If your track rails do not meet squarely, your trains will derail. This is actually true anywhere on the layout. Your rail ends must meet squarely.
If you choose a switching layout, which, typically is end-to-end, you won’t have wide curves at the ends. I wanted my trains to roll continuously.
Make All Girders Level
Make sure girders are level from one end of the layout to the other. This will prevent runaway freight when you uncouple a line of cars from your train. With level girders, you will have an easier time attaching your tabletop.
Some modelers choose open-grid benchwork. I prefer a solid tabletop and use foam risers for variations in track height on the layout.
When your shelf-style benchwork is finished, you are well on your way to a great model railroad. Your next step is choosing a base for your cork roadbed. I encourage using extruded foam.
Model railroading is a tremendous hobby.
- Tell me about your layout!
- Have you faced challenges?
- What scale do you model?
- What style benchwork do you prefer?
- Post some photos!
Thanks for reading!

You’d be the expert I would count on if I were! Many blessings!
LikeLike
Thanks! Hope you’re doing well.
LikeLike