My purpose in sharing these thoughts and photos is to assist you in the development of your HO scale model railroad. If there is a set of rules for model railroaders, I haven’t seen it. Rule number one should be, Do Not Hurry! No matter how bad you want to see trains rolling by at eye level, you will save yourself mountains of work by planning, measuring, measuring again, redoing your plan, waiting, rethinking, and then finally, starting over with a blank piece of paper. Maybe not that bad, but don’t hurry. Do it right the first time.

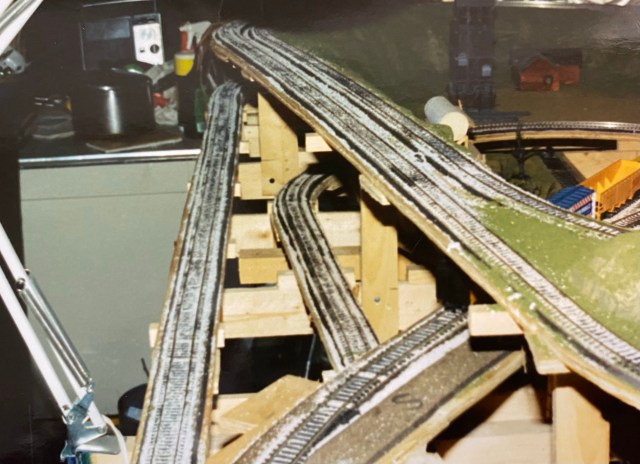
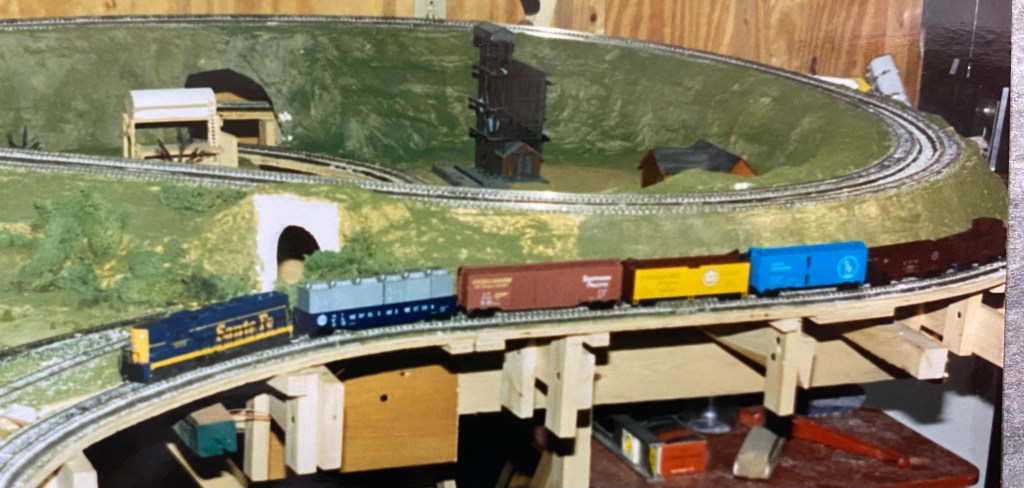
At a glance, my first attempt to build an HO scale model railroad layout wasn’t too bad. It was a “reverse-dog-loop” style with a double mainline. I always wanted to run two trains at the same time, and watching them pass over each other is fascinating.
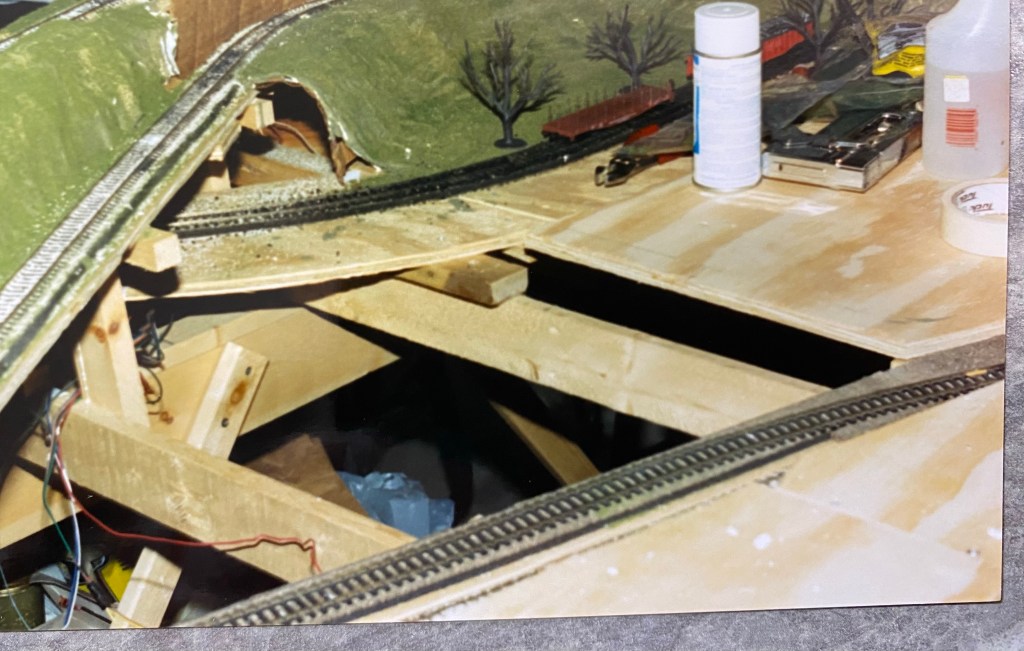
Since this was my first real layout, I was determined to do it right, so I immediately began making serious mistakes. As you can see, I made the roadbed underlayment too narrow, resulting in aggravation later. I cut the 3/8″ plywood base layer just wide enough for the cork roadbed.

I decided on the “open-grid” style of benchwork. I followed step-by-step instructions I found in Linn Westcott’s book, “How to Build Model Railroad Benchwork.” (I’m not an Amazon affiliate – I just thought it might be helpful to include a link.)
I started by building six leg-braces 36 inches wide. I used 1×4 inch pine for the girders, and secured 1×2 inch furring strips on the top with glue and screws. I fastened the girders to the leg joists creating an “L” shape. I then fastened 1×3 inch joists across the girders at 24-inch intervals. It didn’t take me long to realize I was going to run out of space, even with what I thought was a huge benchwork design.
As you can see in the photo, I had to extend the joists to accommodate the curves. Even with the increase, my widest curve radius was only twenty-four inches. I built a bunch of risers of various lengths, using 1×3 inch pine, to support the roadbed.
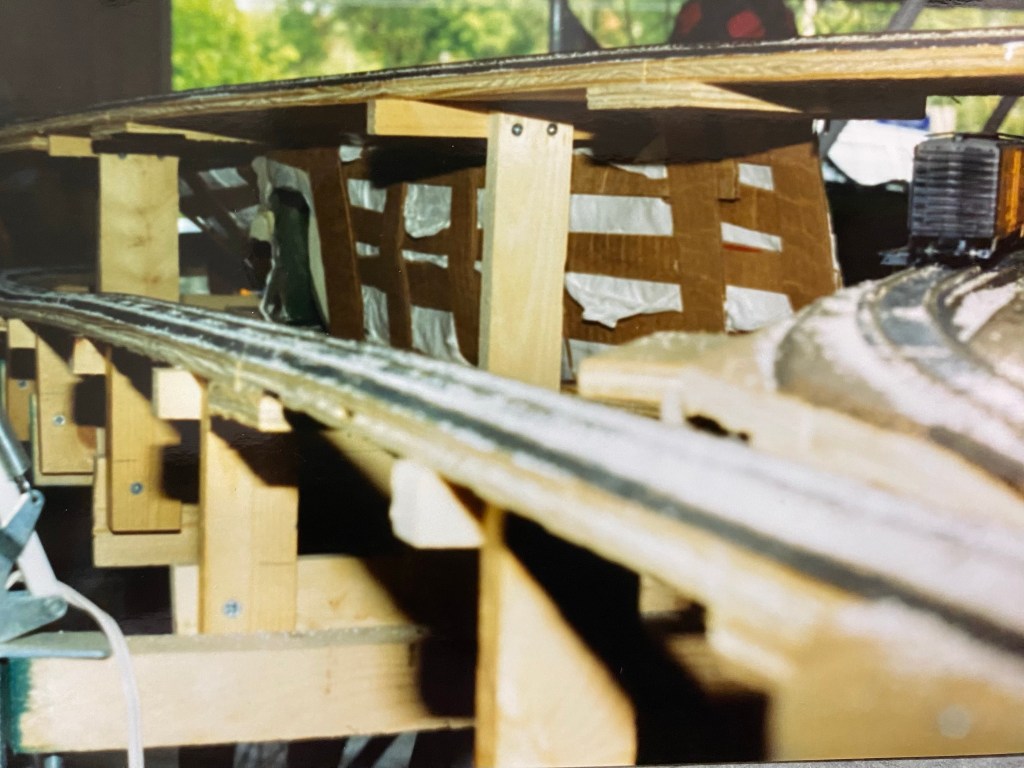
I made a huge mistake by not accurately measuring grades. I started with the height of clearance needed for one train to pass under another, adding extra space to allow for roadbed and scenery. I then went backwards from the overpass to the base level of the layout. What I ended up with was approximately a 5% grade. When I started running trains, it was immediately apparent only my two best diesels would be able to pull any more than two or three cars.

As a result of my experience with open grid benchwork, I think it would be best used on a much larger model railroad. Throughout the life of this layout, I spent a lot of time compensating for choices I made early in the process. Creating scenery was very difficult because I had no base from which to build.
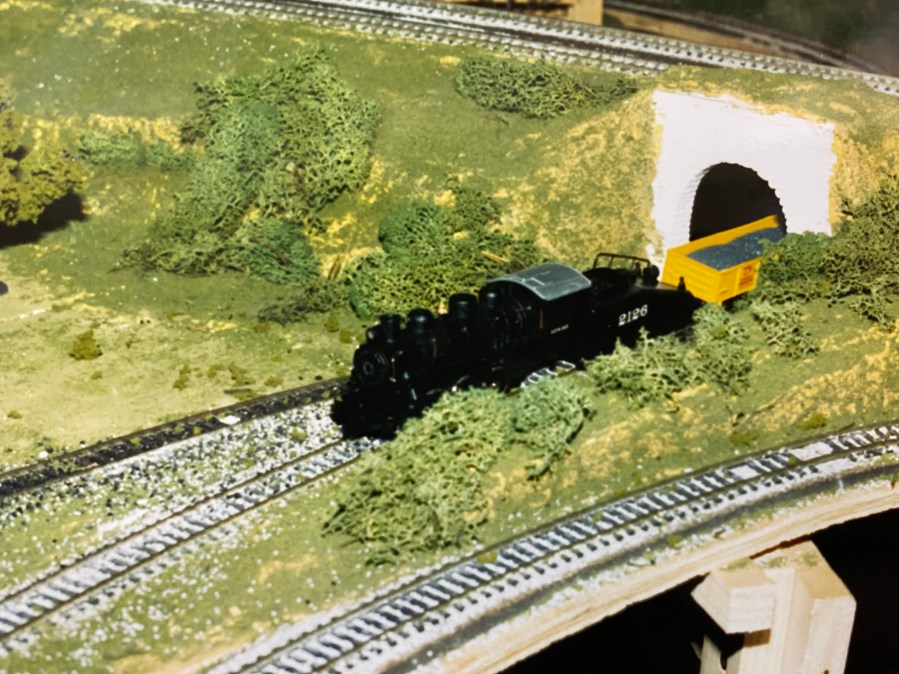
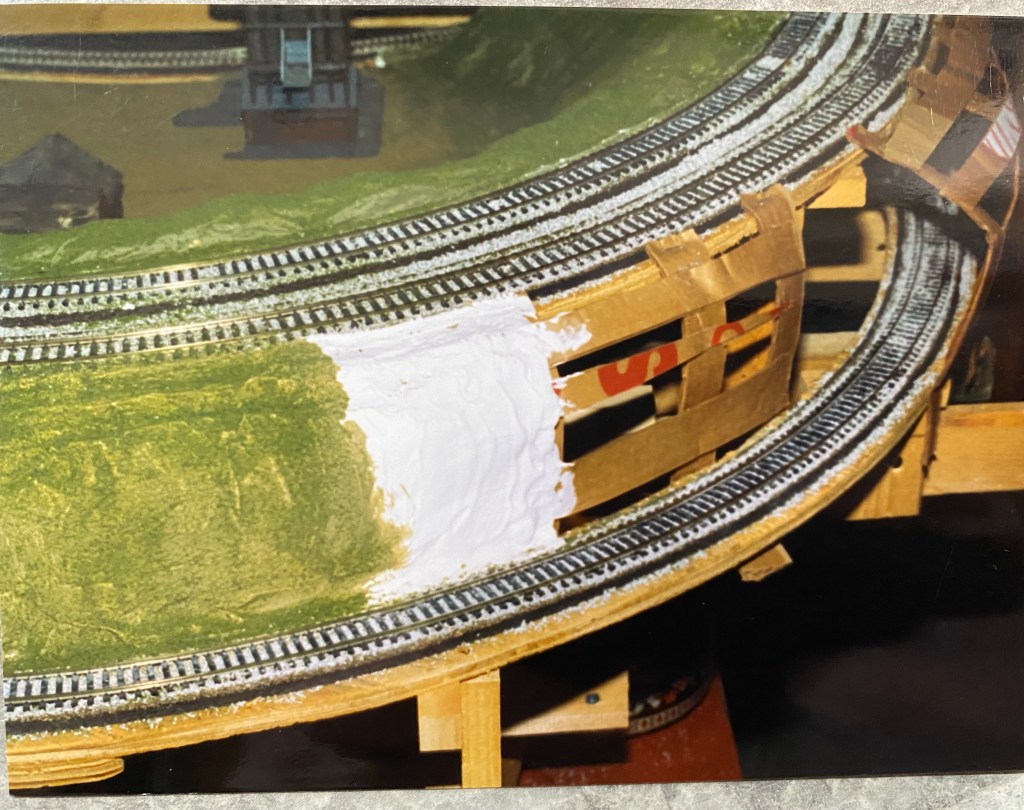
The scenery shell was cardboard strips covered with plaster-soaked paper towel. I did not allow enough distance between different levels of roadbed, so much of the shell between them was nearly vertical. I had to add support for tunnel portals after the plaster shell was in place.
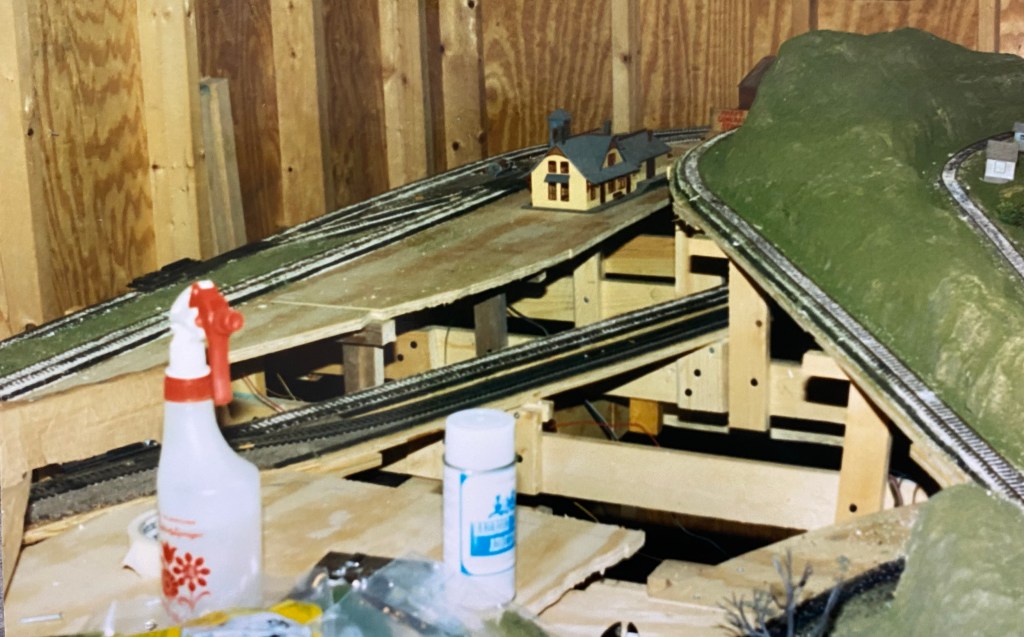
Adding scenery to the layout created viewing problems. Trains moving along the back of the layout were hidden, so about a quarter of the action was out of sight.


My track plan left very few options for scenery. The open areas were small, resulting in very little room for buildings. So, the layout looked more like a mountainous area with trains moving through it than any kind of residential or commercial area.

In Mistakes on My First and Second HO Scale Model Railroads that Taught Me What Not To Do, Part 2, I will share photos of my second layout and discuss the differences between the two. I will conclude with a few photos from my third layout, The Maple Valley Short Line Model Railroad.
Thanks for reading! Happy Model Railroading!
